
how to cut metal with a band saw comes down to two things most people skip: the right blade and a setup that keeps the work from moving even a little. If you get those right, metal cutting starts to feel predictable instead of stressful.
A band saw looks “calmer” than an angle grinder, but it can still grab, throw chips, snap blades, or pull a part into the cut if you rush the feed or clamp poorly. That’s usually when people get nicked, ruin a blade, or end up with a crooked cut they can’t use.
This guide stays practical: what to check before you cut, how to pick blade pitch for different metals, what speeds and cutting fluid usually do best, and how to make repeatable cuts without beating up your saw.
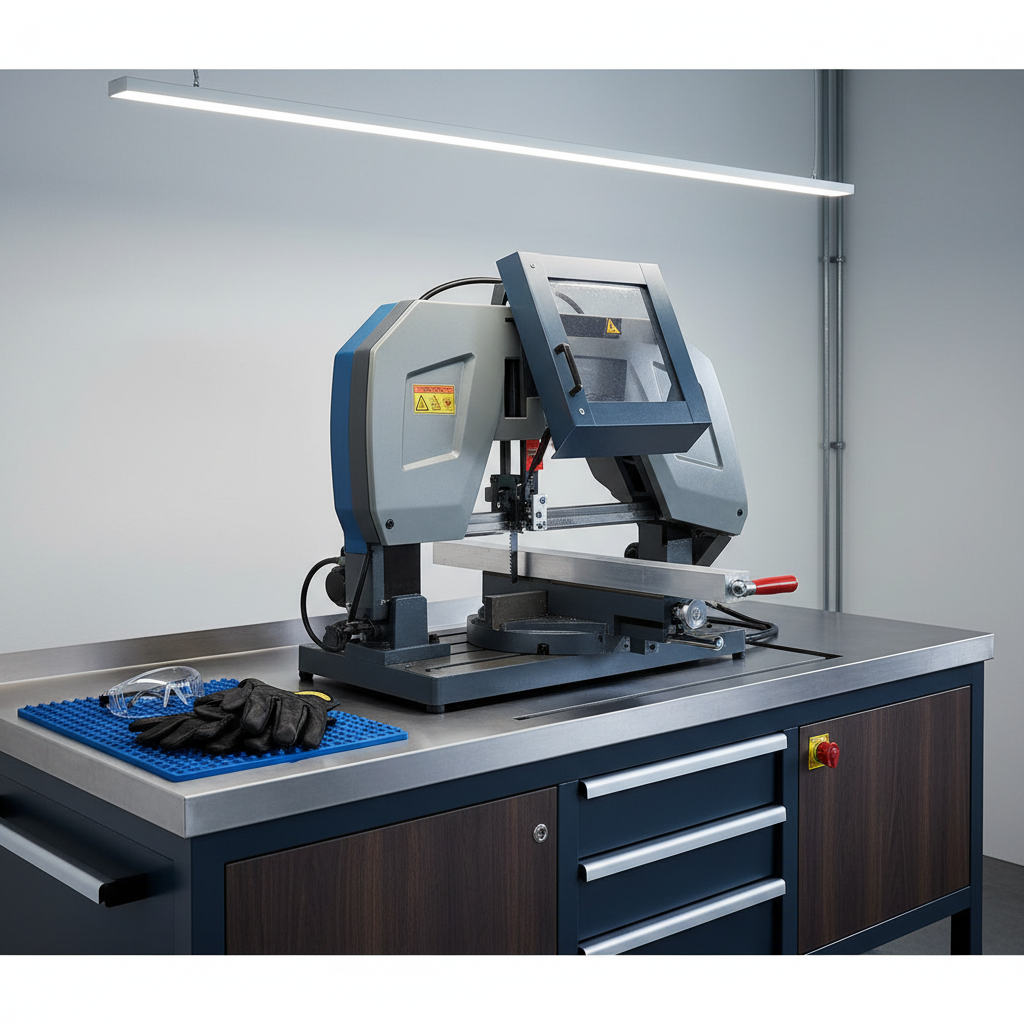
Know your band saw: vertical vs. horizontal (and why it matters)
Before talking technique, make sure you’re using the right “style” of band saw in the right way. The safety risks and the cutting approach change.
- Horizontal band saw: The saw head pivots down through a clamped workpiece, usually with a built-in vise. This is the most forgiving setup for metal because the stock stays fixed and feed pressure stays consistent.
- Vertical band saw: You guide the workpiece by hand across a table into an upright blade. Great for curves and shaping, but it demands tighter discipline around hand position, push tools, and avoiding binding.
If you’re learning how to cut metal with a band saw, a horizontal saw (even a small one) usually offers the easiest path to straight, repeatable cuts with fewer “surprises.”
Safety baseline: PPE, guarding, and shop habits that prevent dumb injuries
Most band-saw mishaps come from small lapses, not dramatic failures. Set a baseline and stick to it.
- Eye protection: Metal chips and broken teeth can travel farther than you expect.
- Hearing protection: Especially on harder alloys or when the blade is dull and squealing.
- No loose sleeves, jewelry, or dangling cords: Band saw blades love grabbing anything stringy.
- Gloves: be selective: Many shops avoid gloves near rotating equipment; with band saws, thin gloves can reduce chip cuts, but they can also snag. If you’re unsure, follow your shop policy or ask a qualified safety lead.
- Set the blade guard as low as practical: Less exposed blade reduces “oops” contact and improves stability.
According to OSHA, machine guarding is a key control to prevent contact with moving parts and related injuries. If the saw’s guard is missing, damaged, or impossible to adjust, treat that as a stop sign until it’s fixed.
Blade selection: tooth pitch, width, and material (this is where clean cuts start)
Blade choice is where most beginners accidentally sabotage themselves. The right blade makes how to cut metal with a band saw feel easy; the wrong one makes everything chatter and wander.
Pick tooth pitch (TPI) based on wall thickness, not just “metal type”
A simple rule many fabricators use: you typically want at least 3 teeth engaged in the material at all times. Too few teeth and the blade “hooks,” chatters, and can strip teeth.
- Thin wall tube / sheet: higher TPI (for example 18–24 TPI is common)
- General solid bar / medium thickness: mid TPI (often 10–14 TPI)
- Thick solids: lower TPI (often 6–10 TPI)
If you cut mixed sizes, a variable-pitch blade can reduce vibration and handle a wider range.
Blade material: carbon vs. bi-metal vs. carbide
- Carbon steel: cheapest, ok for light use, tends to dull faster on tougher metals.
- Bi-metal: common “workhorse” choice for steel, stainless, and general shop use.
- Carbide-tipped: useful for difficult alloys and production work, but setup and feed control matter more; not always worth it for casual cutting.
Blade width matters more on a vertical saw (curve capability vs. beam strength). On horizontal saws for straight cuts, stick with the width the machine is designed around.
Speed, feed, and cutting fluid: the trio that controls heat and blade life
Heat is the enemy. Too much speed or too much pressure makes the teeth rub instead of cut, and that dulls blades fast.
Most saws give you a surface speed setting (SFM) or a few pulley/gear options. If your machine manual lists recommended speeds, use that first. When you don’t have a chart, these are common directional guidelines:
- Aluminum: faster blade speed, light-to-moderate feed, wax or cutting fluid to prevent loading.
- Mild steel: moderate speed, steady feed, cutting oil helps tooth life and finish.
- Stainless: slower speed than mild steel, consistent feed, fluid strongly recommended to manage heat and work hardening.
Feed pressure should create real chips, not dust and not blue-hot curls. If you see sparks on a band saw, something is off: wrong speed, dull blade, or rubbing from too light a feed.
According to NIOSH, metalworking fluids can help with cooling and lubrication, but they also require ventilation and good hygiene practices in many workplaces. If you run coolant, keep it clean and follow the fluid manufacturer’s handling guidance.
Pre-cut checklist: a 60-second self-check before you pull the trigger
This is the “save your blade” list. Run it quickly and you’ll avoid most avoidable problems.
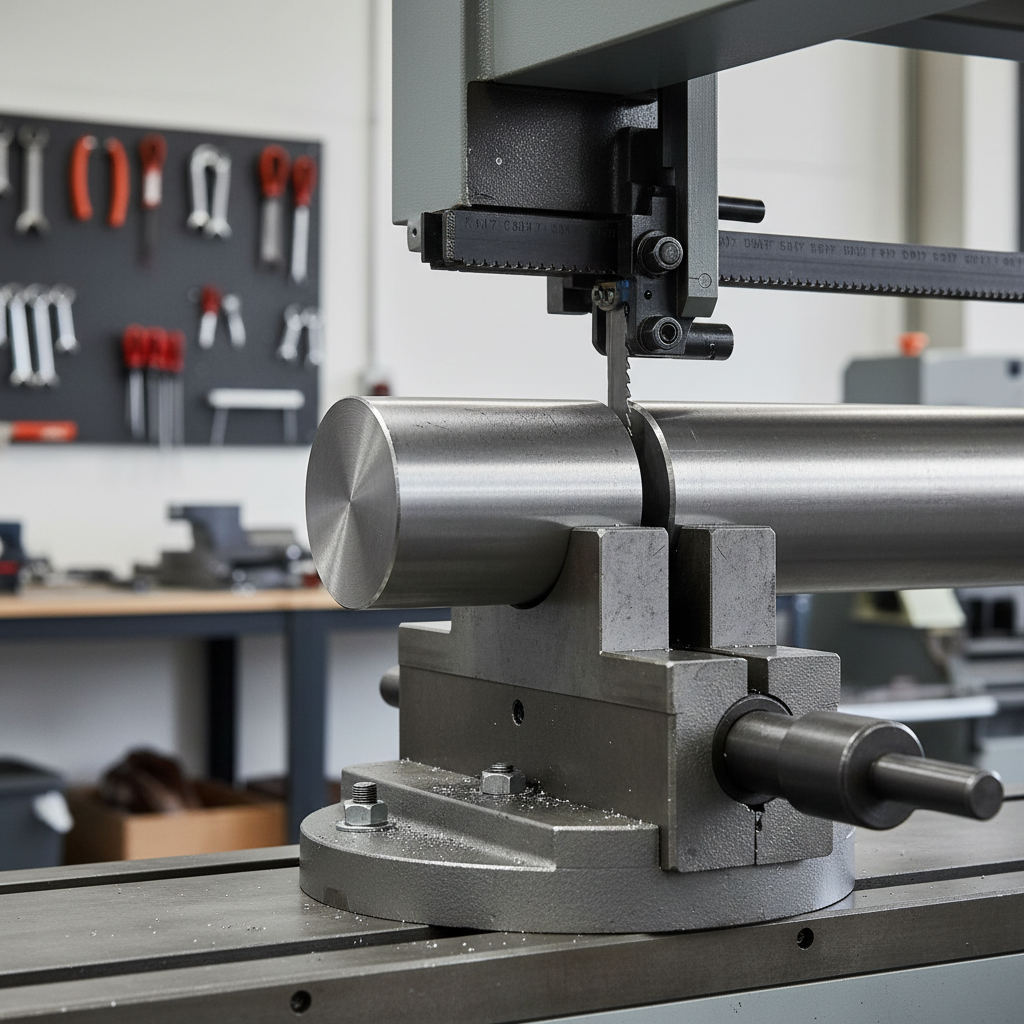
- Stock is clamped and supported, no rocking, no overhang that can pinch the blade as the cutoff drops.
- Correct blade installed, tensioned to the saw’s spec, tracking centered on the wheels.
- Guide bearings/blocks set close to the work to reduce blade twist.
- Guard height minimized (especially on vertical saws).
- Cut line marked, and you’ve thought about kerf width if tolerance matters.
- Coolant/fluid ready if you plan to use it; chips cleared from previous cut.
If one item feels “good enough,” that’s usually the item that bites later.
Step-by-step: making a safe, straight cut (horizontal and vertical)
There’s no single perfect method, but these steps cover what works in many small shops and garages.
Horizontal band saw: straight cutoff
- Square the stock in the vise: use a small machinist square if the cut must be true, especially on rectangular tube.
- Clamp tight: if you can twist the piece by hand, it’s not tight enough.
- Support the drop: a roller stand, scrap block, or a hand positioned safely away can keep the cutoff from tearing a tooth row at the end.
- Start the cut gently: let the blade establish a groove before you increase feed.
- Watch chips: silver chips usually mean cutting; powder often means rubbing; heavy chatter means pitch mismatch or loose clamping.
- Finish without “breaking through” hard: ease up near the end so the last wall doesn’t snap and pinch.
Vertical band saw: controlled hand-fed cut
- Use a fence or miter gauge for straight cuts where possible, it reduces wandering.
- Hands stay out of the line of cut: push from the sides, not directly inline with the blade.
- Let the blade do the work: forcing the piece invites binding and blade deflection.
- For small parts: use a clamp, jig, or push block instead of pinching near the blade.
If the blade starts drifting, don’t “steer harder” immediately. Pause, back out slightly (with the saw running only if your machine and training allow it), and check guide alignment and blade sharpness.
Common metals and blade/pitch suggestions (quick reference table)
Use this as a starting point, then adjust for your exact thickness and your saw’s capabilities. If your manufacturer chart conflicts, follow the manual.
| Material | Typical situation | Common blade choice | Notes that keep it safe |
|---|---|---|---|
| Aluminum | Extrusions, plate, tube | Bi-metal, variable pitch | Prevent chip welding with wax/fluid, clamp well to avoid grabbing |
| Mild steel | Angle iron, flat bar, tubing | Bi-metal, general-purpose pitch | Moderate speed, steady feed, don’t baby it or it rubs |
| Stainless steel | 304/316 bar and tube | Bi-metal, often finer pitch | Slower speed, consistent feed to reduce work hardening |
| Tool steel | Harder stock, dies, fixtures | Bi-metal or carbide (situational) | Slow down, expect slower cutting, prioritize rigidity and coolant |
Mistakes that cause blade breaks, crooked cuts, and scary binds
A lot of “my saw is junk” complaints end up being one of these.
- Wrong TPI on thin stock: teeth snag, strip, and the cut goes sideways.
- Loose vise or unsupported cutoff: the part shifts near the end and pinches the blade.
- Guides set too far: extra exposed blade twists and wanders.
- Too fast on steel: overheats teeth and dulls quickly.
- Too light feed: sounds safer, but it can rub and harden stainless, then the cut gets worse.
- Starting on an edge without a flat: round stock especially likes to roll; use proper V-blocking or a jig.
If you’re trying to learn how to cut metal with a band saw and you keep getting drift, check the simple stuff first: dull blade, incorrect tension, guides misaligned, or stock shifting.
When to stop and get help (or at least a second set of eyes)
Some problems are “adjustment” problems, others are “don’t run this machine” problems.
- Blade breaks repeatedly even after changing blade type and checking tension, guides, and clamping.
- Electrical issues: tripping breakers, burning smell, inconsistent motor speed.
- Damaged guards, worn wheels, cracked tires: these can turn into unpredictable failures.
- You’re cutting unknown alloys or salvage metal that may contain hardened sections, coatings, or embedded debris.
If you’re in a workplace environment, follow your lockout/tagout procedures and involve a qualified supervisor or maintenance tech. In a home shop, it may be worth having a reputable tool repair shop inspect alignment and wheel condition if the saw won’t track consistently.
Key takeaways (so you can cut confidently next time)
- Clamp and support matter as much as blade choice, especially near the end of the cut.
- Match TPI to thickness so multiple teeth stay engaged, that’s how you avoid grabbing and chatter.
- Control heat with appropriate speed, steady feed, and fluid when it makes sense.
- Watch the chips: they tell you more than the sound does.
If you want one action item, do this: before your next cut, spend two minutes confirming blade pitch and clamping, and you’ll usually see the biggest jump in cut quality and safety.