
How to use a pry bar to remove nails comes down to two things, controlling leverage and protecting the surface so you pull the fastener without tearing up the wood or your knuckles.
If you have ever tried to yank a nail and ended up with a cratered trim board, a bent nail that snaps, or a pry bar that keeps slipping, you are not alone. Most “hard” nail removals fail because the setup is wrong, not because the nail is impossible.
This guide walks through choosing the right pry bar, setting up a fulcrum, and using a few small tricks pros rely on, especially when you want to reuse the board, avoid splitting, or remove finish nails cleanly.
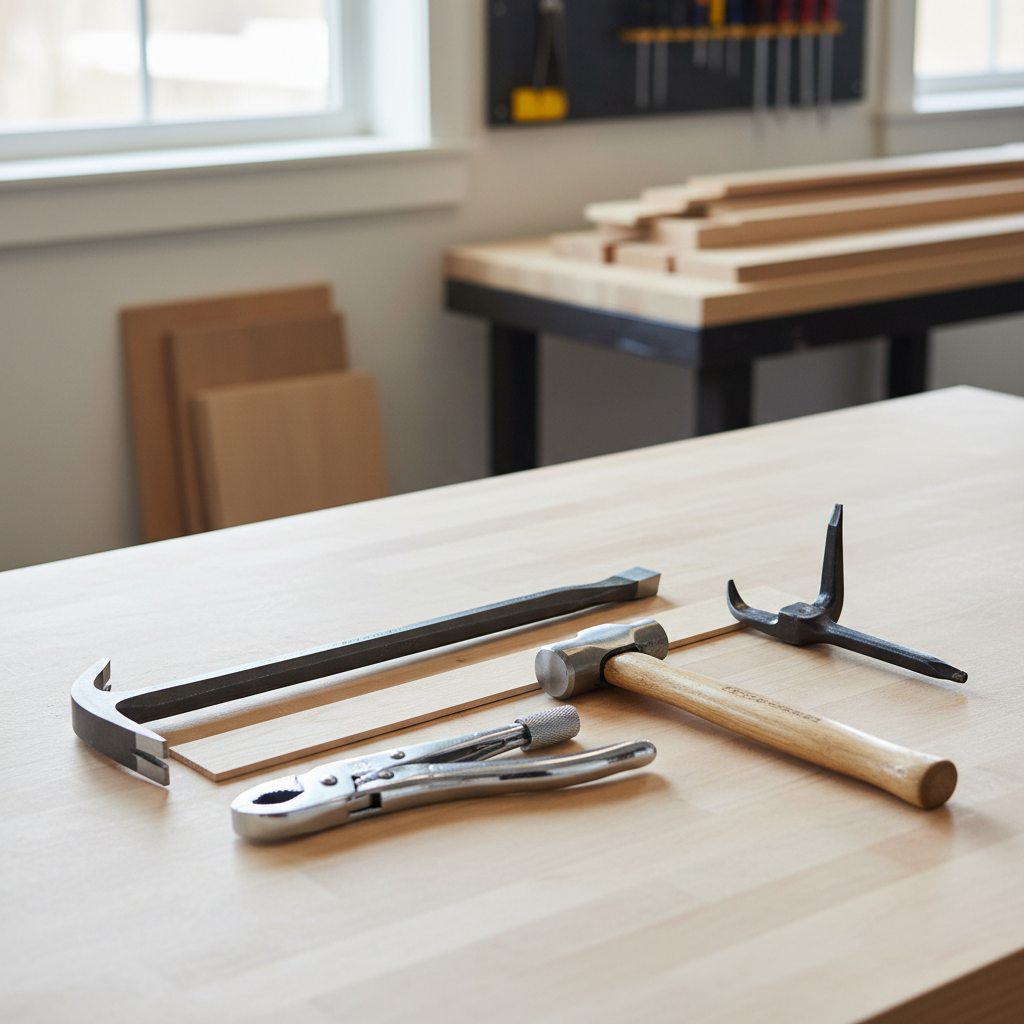
Pick the right pry bar for the nail and the job
Not all pry bars behave the same. The length, tip shape, and how sharp the “beak” is matter more than brand, especially in tight spaces or delicate trim.
- Flat bar (a.k.a. “wonder bar”): Good general-purpose option for baseboards, light demolition, and prying where you can slide a thin edge under material.
- Cat’s paw (nail puller): Best for nails with buried heads, or when you can sacrifice the surface and plan to patch later. It bites into wood to grab the nail.
- Small trim pry bar: Thinner profile for casing and trim where you want less damage and better control.
- Long wrecking bar: More leverage for framing nails, but easier to overdo it and crack boards if you do not use a pad.
A quick reality check, if the nail head is exposed, a flat bar often wins. If the head is buried or snapped off, a cat’s paw or locking pliers usually does better than forcing a flat bar to dig.
Safety and prep that prevents most mistakes
When you slip while prying, the bar snaps free with a lot of stored force. That is where bruised hands and gouged surfaces come from.
- Wear eye protection, nails can pop and fly, especially if they break.
- Use gloves when possible, but keep dexterity if you are doing finish work.
- Check for hidden wires or plumbing before you pry aggressively in walls. According to OSHA, employers must address struck-by and electrical hazards on jobsites, and the same logic applies to DIY, slow down when you are not sure what is behind the material.
- Support the work, clamp the board or stabilize the assembly so the pry force goes into the nail, not into flexing the piece.
If you suspect the nail ties into a structural connection, or you are working on older materials where lead paint might be present, consider getting guidance from a qualified contractor or local pro, since removal methods and cleanup practices can differ by scenario.
How leverage actually works (and why your wood keeps denting)
If you understand one concept, make it this, the pry bar is a lever, and your “fulcrum” is whatever the bar rolls over. A sharp fulcrum point concentrates force and dents wood fast.
So instead of prying directly on the surface, add a sacrificial pad under the bar.
- Wood shim for finished surfaces, reduces dents and spreads pressure.
- Thin scrap plywood when you need a wider base for heavy leverage.
- Putty knife as a starter to get under trim gently, then slide the bar in.
One more detail people miss, do not start with maximum force. Rock the bar in short controlled movements, lift a little, reset the bar closer to the nail, lift again. That “walk it out” approach reduces splitting and keeps nails straighter.
Step-by-step: removing nails with a pry bar (clean method)
How to use a pry bar to remove nails cleanly usually looks slower than you expect, but it saves time on patching.
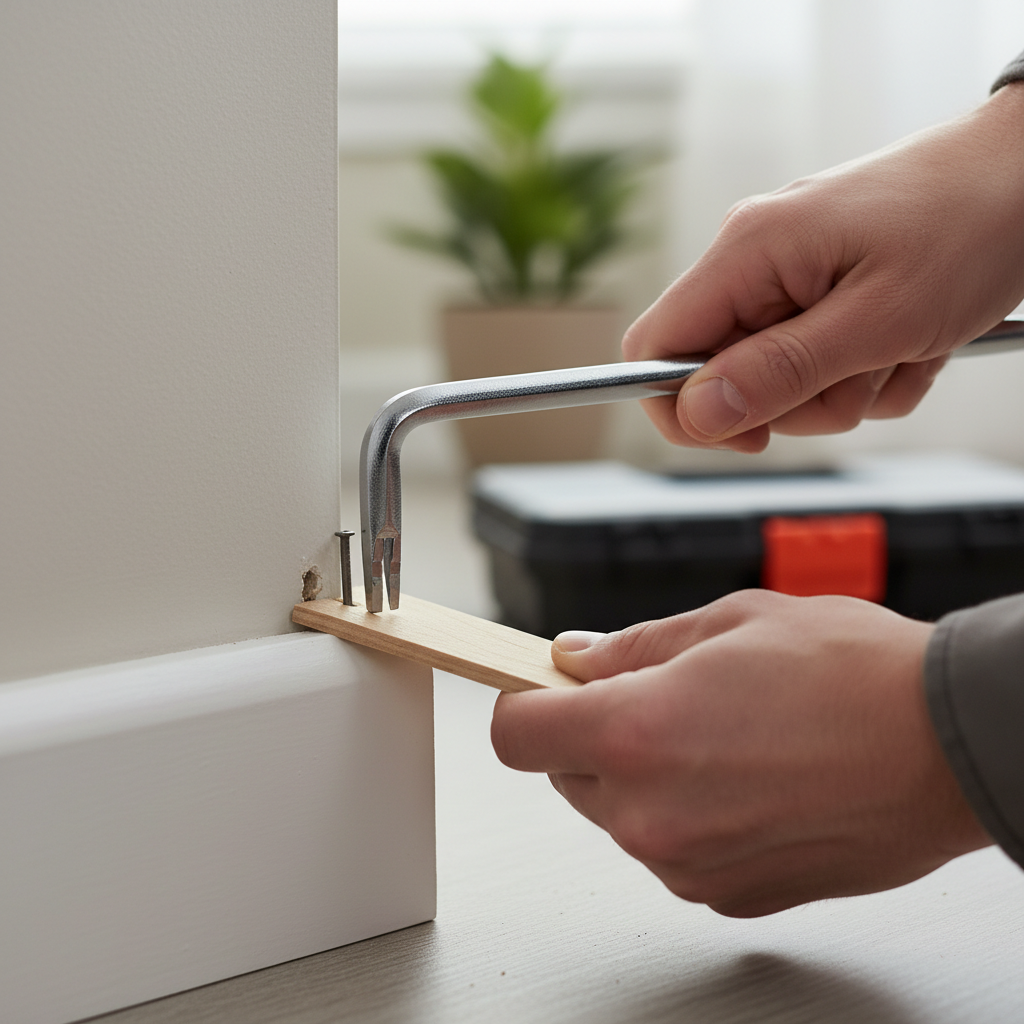
1) Expose the nail head or create a bite point
- If the head is accessible, slide the pry bar notch under it.
- If paint seals the head, score around it with a utility knife so the finish does not tear.
- If the head sits flush, tap a thin putty knife under the head, then follow with the bar.
2) Place a pad and set your fulcrum
- Put a shim between the bar and the surface.
- Keep the fulcrum close to the nail for control, farther away increases lift but also damage risk.
3) Pry in small lifts and reset
- Lift the nail slightly, then stop.
- Reposition the bar so the notch grabs deeper under the head.
- Repeat until the nail stands proud enough to pull easily.
4) Finish the pull without tearing fibers
- Once the nail is up, you can keep using the bar, or switch to a claw hammer for a smoother roll.
- If the nail resists, twist it slightly as you lift, that breaks friction along the shank.
If the nail starts bending, pause and change tactics rather than “muscling through,” a bent nail often rips a larger path through the wood on the way out.
Common scenarios and what to do differently
The right technique depends on the nail type and what you want to preserve, the wood, the nail, or your time.
| Situation | What usually works | What to avoid |
|---|---|---|
| Finish nails in trim | Thin trim bar + shim, lift gradually, pull straight | Prying hard at one spot, it crushes the profile |
| Framing nails (common nails) | Longer bar for leverage, wider pad, “walk out” method | Levering directly on edge grain, it can split |
| Roofing nails | Flat bar under shingle, pry near nail, keep shingle supported | Over-bending shingles in cold weather, cracking risk |
| Nail head buried | Cat’s paw to expose, then pry or pull with pliers | Digging wildly, you create a large patch area |
| Rusty or glued/sticky nails | Rocking motion, add penetrating oil if appropriate, patience | Sudden max force, nail snaps and becomes harder |
Quick self-check: why the nail won’t come out
Before you keep prying, check which “stuck” category you are in. This saves a lot of frustration.
- The bar slips off: You do not have a clean bite, or the head is too shallow. Create access with a putty knife, or switch tools.
- The wood dents: No pad, or the fulcrum is too sharp. Add a wider shim or scrap.
- The nail bends: You are pulling at an angle, or the shank is long and thin. Reset and pull straighter, lift in smaller stages.
- The nail snaps: Rust, adhesive, or brittle fastener. Consider pulling from the backside if possible, or switch to locking pliers and work it out slowly.
- The board moves more than the nail: Lack of support. Clamp, brace, or change where you apply force.

Once you name the problem, the fix is usually obvious, more bite, more support, more surface protection, or less aggressive leverage.
Practical tips that make nail removal easier
- Score paint and caulk first on trim, it reduces tear-out and chipped paint lines.
- Use two shims as the nail rises, stack shims to keep the bar angle efficient instead of over-rotating.
- Pull straight when you can, side-loading bends nails and enlarges the hole.
- For hidden nail heads, a cat’s paw can start the job, then a flat bar can finish it with less damage.
- If you need to save the board, accept tiny resets. One big pry often does more harm than five small ones.
Key takeaway: control beats force. A pry bar gives plenty of leverage, your job is to aim it so the nail moves, not the wood fibers.
Common mistakes to avoid (and when to call a pro)
A few missteps show up constantly, even with experienced DIYers.
- Prying on finished faces without a pad, you can repair dents, but it often takes longer than the removal.
- Using the wrong bar for the space, thick bars in tight trim gaps tend to chew edges.
- Trying to “save” a twisted or split nail, if it deforms early, changing approach is usually faster.
- Ignoring what the nail connects, some assemblies depend on fasteners for safety or load paths.
If you are removing nails from structural framing, stair parts, or anything that might affect load-bearing strength, getting input from a qualified contractor is a smart step. If you run into suspected asbestos-containing materials, lead paint concerns, or uncertain electrical routing, it is also worth involving a professional rather than guessing.
Conclusion: a simple routine that works most of the time
How to use a pry bar to remove nails is less about brute strength and more about setup, bite, and patience. Pick a bar that fits, protect the surface with a shim, lift the nail in small stages, and switch tools when the nail starts bending or the head is buried.
If you want an easy next step, try the “shim + small lifts + reset” routine on one nail first, once it feels controlled, the rest of the project usually goes faster and cleaner.