
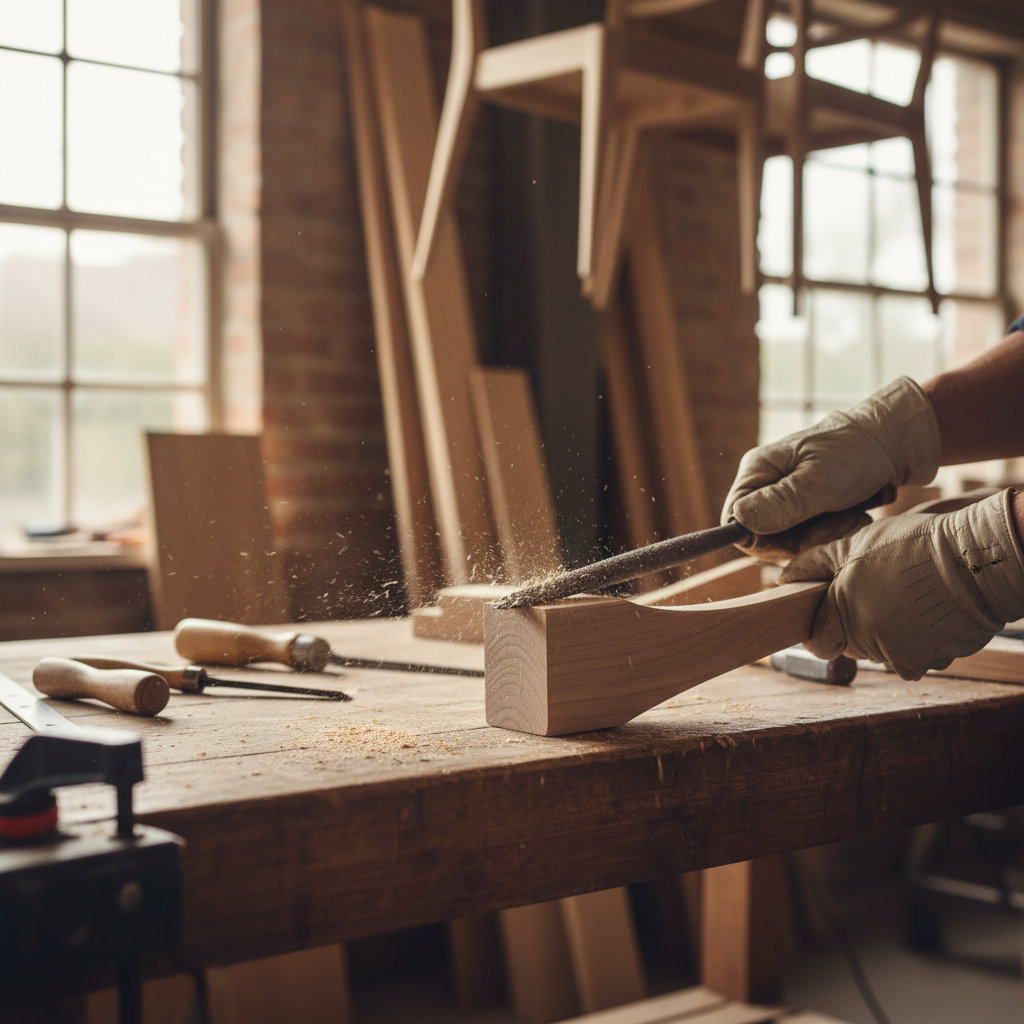
Rasp file wood shaping is one of the quickest ways to remove material when a plane feels too slow and sandpaper feels pointless. If you do rough work often, the right rasp (and a few technique tweaks) can turn “fighting the wood” into steady, predictable progress.
Most people get frustrated for two reasons, they buy a rasp that’s too coarse or too cheap, or they use it like a metal file and end up with chatter, torn grain, and sore wrists. The tool isn’t complicated, but the details matter more than you’d think.
This guide breaks down what makes a rasp good for rough shaping, how to choose the cut and size, and how to work faster without wrecking the surface. You’ll also get a quick self-check, a comparison table, and a few “don’t do this” notes that save time in real shops.
Why a rasp shines in rough wood shaping
A rasp is basically a controlled “micro-chisel” surface. Instead of relying on abrasive grit, it uses raised teeth to cut. For rough work, that usually means three advantages you feel right away.
- Fast stock removal with control, you can remove a surprising amount of wood while still steering the shape.
- Works on curves and odd profiles, chair parts, tool handles, cabriole legs, sculpted edges.
- Less setup than powered options, no dust collection requirements, no belts, no noise spikes.
That said, rasps are not a replacement for everything. If you need dead-flat surfaces or precise thicknessing, you’ll still reach for planes, spokeshaves, scrapers, or a sander. Think of the rasp as the “get the shape close” tool.
Common causes of rough, torn results (and what they actually mean)
When rough shaping looks ugly, it’s usually not because you “lack skill.” It’s often a mismatch between rasp, wood, and stroke.
1) The rasp is too coarse for the grain
Very coarse cabinet rasps can tear out on ring-porous hardwoods like oak and ash, especially across changing grain. You still can rough-shape, but you may need a slightly finer cut to keep the surface from looking like it was chewed.
2) You’re loading the teeth
Resinous woods (pine, fir) and some oily species can pack teeth quickly, which makes the rasp skate and burnish instead of cut. If the tool suddenly feels “slick,” it’s usually clogged.
3) Workholding is moving, not the tool
If the piece flexes or shifts, your stroke becomes inconsistent, and the rasp chatters. Rough work tempts you to muscle through, but you’ll get a cleaner result by clamping harder, not pushing harder.
4) Wrong direction strokes on reversing grain
Curved parts often have grain that changes direction across the profile. A stroke that cuts clean on one area can tear another, so you may need to swap push direction, skew the rasp, or switch to a finer tool for a few passes.
Quick self-check: what kind of rasp work do you actually need?
Before buying anything, decide which of these describes your task most of the time. It makes the “which rasp” decision much clearer.
- Heavy rough-out: removing bandsaw marks, knocking down corners, fast shaping thick hardwood blanks.
- Controlled shaping: fairing curves, refining transitions, keeping symmetry on paired parts.
- Detail work: tight concaves, small radii, close-to-finish shaping before scraping/sanding.
If you mainly do heavy rough-out, you’ll want a coarser rasp or a rasp plane. If you mostly refine, a medium cut cabinet rasp often feels better than the “aggressive” options people default to.
Choosing a rasp file for rough work (size, cut, and shape)
The market has a lot of overlap in naming, and brands don’t always label cuts consistently. Still, a few practical rules hold up in most shops.
Length: 8–10 inches is the “do-most-things” zone
Short rasps feel nimble but can leave a wavy surface if you’re not careful. Very long rasps remove material quickly, but they demand good workholding. For many users, an 8–10 inch rasp hits the balance for rough shaping.
Cut/coarseness: coarse for removal, medium for control
For rasp file wood shaping, a coarse tool is great when you truly need to move wood, but medium often looks better and still cuts fast. Many people buy ultra-coarse first, then realize they spend extra time cleaning up.
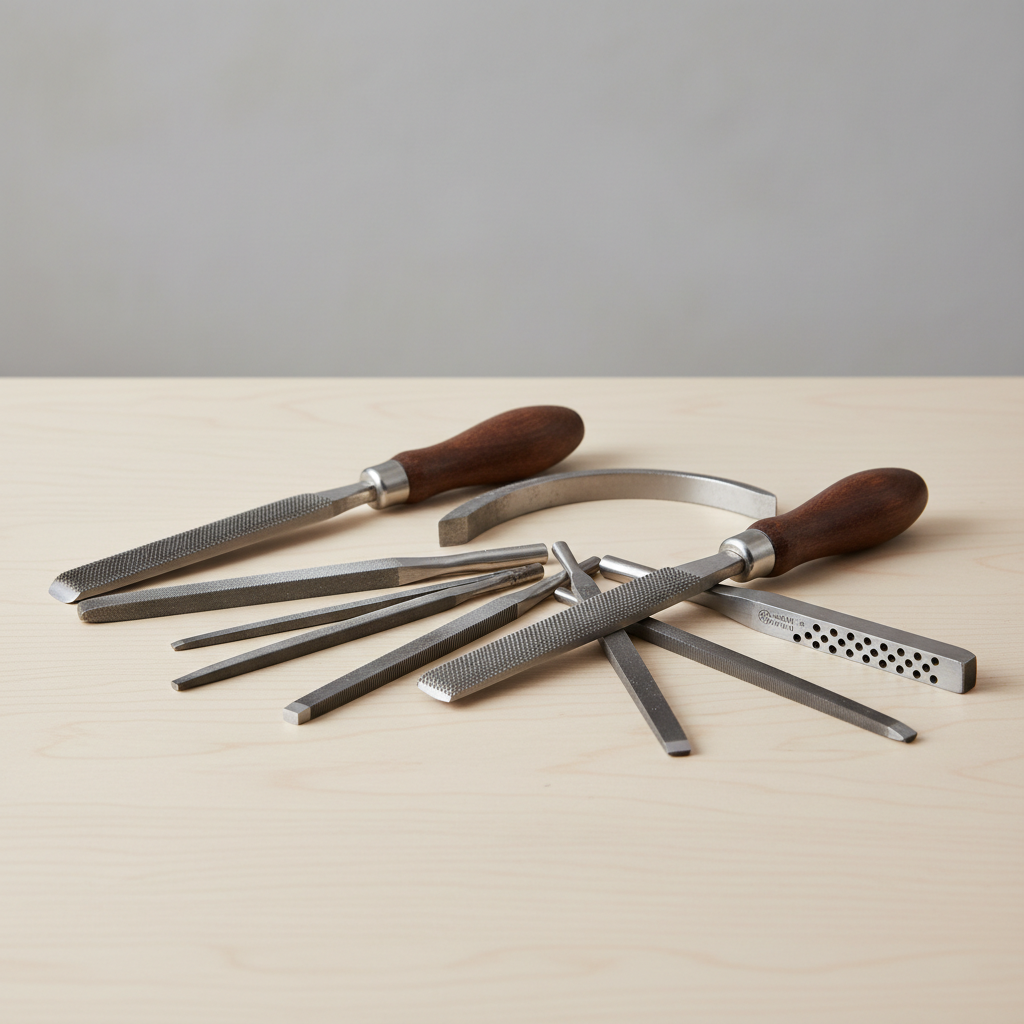
Shape: pick based on the geometry you keep hitting
- Flat cabinet rasp: general rough work on convex curves, edges, and broad transitions.
- Half-round rasp: one tool that handles flats and gentle concaves.
- Round/rat-tail rasp: tight inside curves and holes, slower for big shaping.
- Rasp plane: aggressive removal on larger surfaces, but less nimble on small parts.
A simple comparison table
| Tool | Best for | Watch-outs |
|---|---|---|
| Coarse cabinet rasp | Fast rough-out on hardwood blanks | Can tear grain, more cleanup |
| Medium cabinet rasp | General shaping with better surface | Slower if you need heavy removal |
| Half-round rasp | Curves, transitions, mixed profiles | Flat face is narrower than a true flat rasp |
| Rasp plane | Big, quick removal on broader areas | Can leave deeper tracks |
| Micro/needle rasp | Small detail shaping | Not efficient for rough work |
How to use a rasp for rough shaping without wrecking the surface
Good rasp work is less about strength and more about angle, pressure, and a consistent reference.
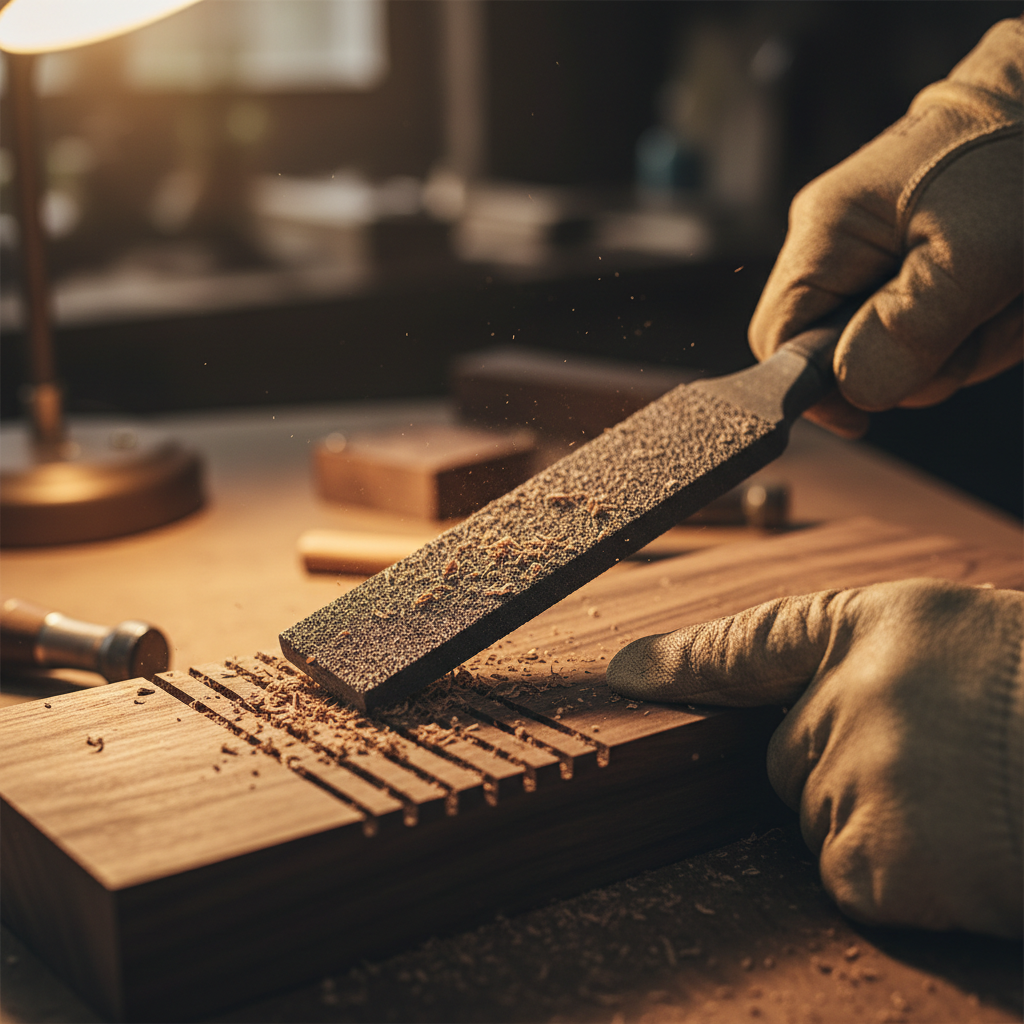
Use long strokes, but keep the contact “honest”
Try to keep the rasp engaged along as much of its length as the shape allows. Short scrubbing strokes tend to dig grooves. Long strokes tend to average out your hand wobble.
Skew the tool to cut smoother
Instead of pushing straight, rotate the rasp slightly so it travels at a diagonal. This “skew cut” often reduces chatter and makes the teeth feel less grabby, especially on hardwood.
Pressure: firm on the push, light on the return
Many rasps are designed to cut mainly on the push stroke. Dragging back with pressure can dull teeth and clog faster. Keep the return stroke light and controlled.
Mark your boundary lines and check symmetry early
Rough work gets away from you fast. Pencil lines, centerlines, and a couple of quick caliper checks prevent the common problem, one side “mysteriously” ends up thinner.
- Tip: For paired parts, rough-shape both to 70–80% before refining either one.
Practical workflow: rough-out to ready-for-scraper in 4 stages
If your goal is a clean curve and a predictable finish schedule, this workflow tends to stay efficient. Adjust the tools based on what you own.
- Stage 1: Layout — mark no-go lines, centerlines, and key thickness points.
- Stage 2: Aggressive removal — use a coarse rasp or rasp plane to knock off corners and saw marks.
- Stage 3: Fair the curve — switch to a medium rasp or half-round, use long skewed strokes to blend.
- Stage 4: Refine the surface — go to a finer file, scraper, or sandpaper depending on your finish target.
If you’re chasing a furniture-grade surface, consider stepping from rasp to card scraper before sanding. Sandpaper can follow rasp grooves and make them harder to remove than you expect.
Care, cleaning, and safety notes people skip (then regret)
Rasps last longer than many expect, but only if you keep teeth clear and avoid accidental impacts.
- Clean often: use a file card or stiff brush. For stubborn pitch, a dedicated cleaner may help, follow product directions.
- Don’t let rasps touch: store individually or in a rack, teeth banging together dull fast.
- Clamp like you mean it: a slipping workpiece can cause a sudden jump and a cut to your hand.
- Wear eye protection: rasping can flick chips, especially on brittle hardwoods.
According to OSHA, eye and face protection is recommended when exposed to flying particles in shop settings, which can apply to hand-tool work like rasping depending on the material and force.
Key takeaways before you buy or start shaping
- Match coarseness to your goal, ultra-coarse is fast but demands more cleanup.
- Workholding matters, chatter is often a clamp problem, not a tool problem.
- Skewed strokes cut cleaner, especially on hardwood and changing grain.
- Plan the handoff, rasp to scraper or file usually beats rasp straight to sanding.
Conclusion: make rough work faster, then make it easier to finish
Rasp file wood shaping works best when you treat it as a shaping system, not a single tool doing everything. Pick a rasp that matches how much wood you truly need to remove, keep the piece locked down, and use long, slightly skewed strokes that leave a surface you can refine without fighting deep tracks.
If you want a simple next move, clamp a scrap blank, draw two boundary lines, and practice blending a curve with a medium rasp before you go back to your real project. Ten minutes of controlled practice saves an hour of sanding later.
FAQ
What rasp should I buy first for rough woodworking?
For many hobbyists, a medium 8–10 inch cabinet rasp is the safest first purchase because it still removes material quickly but leaves a more manageable surface. If you routinely remove a lot of stock, add a coarser rasp later.
Is a rasp the same as a file for wood shaping?
They’re related but not identical. A rasp uses larger teeth intended for wood removal, while a traditional file usually has finer, more uniform teeth and can be better for refinement. In practice, many workflows use both.
How do I stop a rasp from clogging on pine?
Clean more frequently than you think you need, especially when pitch builds. A file card or stiff brush often works, and keeping pressure reasonable helps prevent packing the teeth.
Should I push or pull a wood rasp?
Many rasps cut mainly on the push stroke, with a light return to avoid unnecessary wear. Some specialty tools cut in both directions, but if you feel grabbing on the return, ease up and treat it as a non-cutting stroke.
Why does my rasp leave deep grooves that sanding won’t remove?
Coarse teeth can leave tracks deeper than they look, and sandpaper may simply follow those valleys. Switching to a medium rasp, then a finer file or a card scraper before sanding usually reduces that problem.
What’s better for chair shaping, a spokeshave or a rasp?
They often complement each other. A spokeshave can be faster and cleaner with cooperative grain, while a rasp keeps cutting through tricky grain direction changes and tight transitions. Many chairmakers keep both within reach.
How do I know when to stop rasping and switch tools?
When you’re within a small margin of your layout lines and the curve reads “right” in your hand and by sight, switching to a refining tool usually saves time. If you keep rasping past that point, you often create low spots you’ll chase.
If you’re setting up a small shaping kit and want a more streamlined path from rough-out to finish-ready surfaces, it may help to choose a rasp pair that works together, plus a scraper or fine file that removes rasp tracks without hours of sanding.