
how to change blade in a utility knife usually comes down to two things, knowing what release mechanism you have, and keeping your hands out of the blade’s travel path.
If you’ve ever fought a stuck slider, dropped a loose blade, or realized mid-cut that the edge is dull and tearing material, you already know why this matters, blade swaps are simple until they aren’t, and most “oops” moments happen during the change, not during the cut.
This guide walks through the common utility knife designs in the US, what tools you might need, and a clean, repeatable process that keeps you moving without rushing the risky parts.
Know your utility knife type before you touch the blade
Before you start, take 10 seconds to identify the mechanism, because each style releases differently and forcing the wrong motion is how tabs break or screws strip.
- Retractable slider (most common): blade moves in and out with a thumb slider, often has a button or lever to open the body.
- Folding utility knife: looks like a pocket knife, typically opens via a hinge and uses a quick-release or a screw.
- Fixed utility knife: simple handle, blade clamped by a screw or two.
- Snap-off knife (segmented blade): long blade with break-off segments, common in lighter-duty cutting.
If you’re unsure, look for a small icon or molded instruction on the handle, many brands quietly print “push,” “open,” or an arrow near the release.
Safety basics that actually prevent cuts
Most blade-change injuries happen because the blade isn’t fully retracted, the knife shifts in the hand, or someone tries to “catch” a falling blade. Slow down for one minute and you avoid the mess.
- Retract the blade completely before opening any housing or loosening any screw.
- Work on a flat surface, not on your lap, not while standing on a ladder.
- Wear cut-resistant gloves if you have them, at minimum keep your off-hand away from the blade channel.
- Never pinch the sharp edge, handle blades by the dull sides.
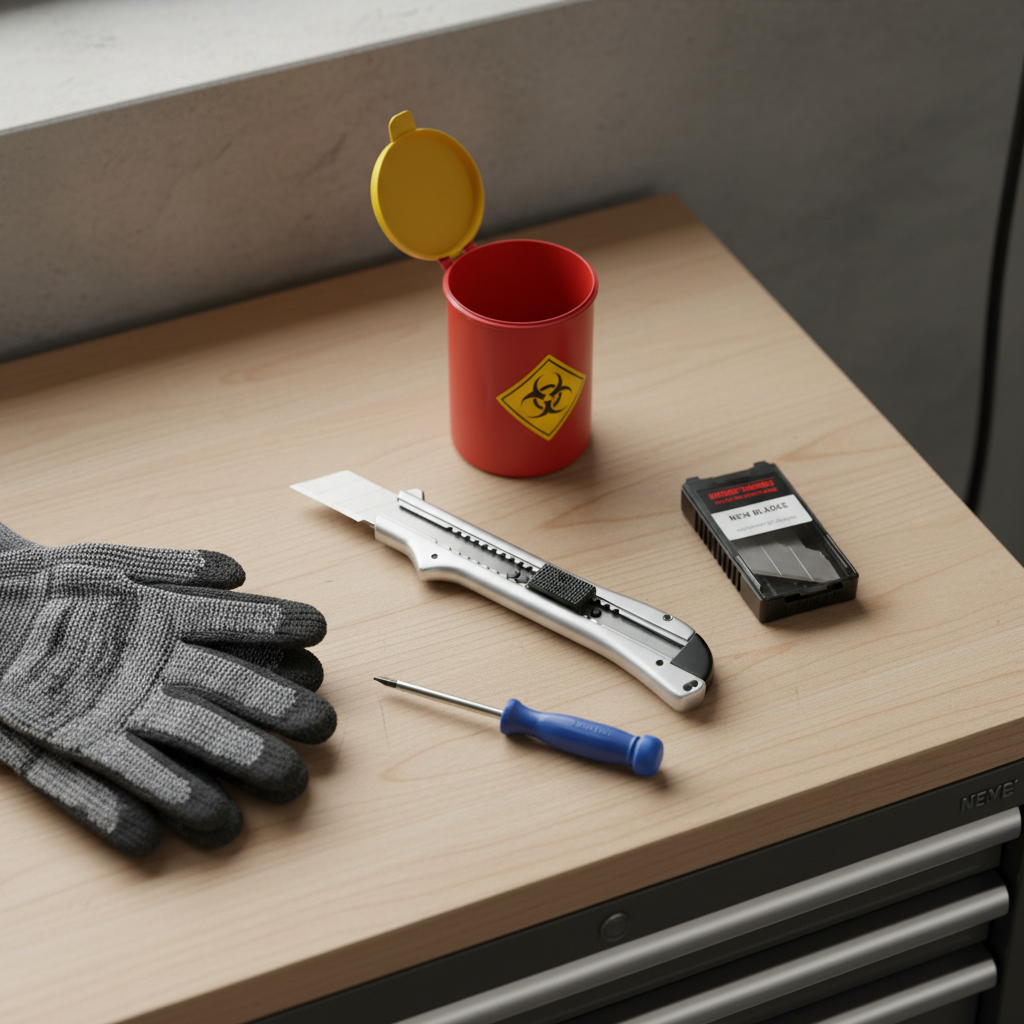
- Use a real sharps container or a dedicated blade bank, not a loose trash bag.
According to OSHA, employers should provide and enforce the use of appropriate personal protective equipment when hazards are present, and that includes cut hazards in many work settings.
Quick self-check: what you need before you start
This is the part people skip, then they end up hunting for a screwdriver with the knife open. If any answer is “no,” pause and set up first.
- Do you have the correct replacement blade format (standard utility, hook, or specialty)?
- Do you have good lighting and a stable surface?
- Do you have a safe disposal option ready?
- If your knife uses screws, do you have the right driver (Phillips, Torx, or flathead)?
- Is the blade fully retracted and the knife locked?
If your knife has a blade magazine, check that the spare stack looks clean, dust and adhesive buildup can cause jams that feel like “a bad knife” when it’s really maintenance.
How to change the blade (step-by-step by mechanism)
how to change blade in a utility knife depends on whether you’re dealing with a quick-release, a tool-free body, or a screw clamp. Pick the section that matches your knife and follow it exactly, no improvising with the blade half-exposed.
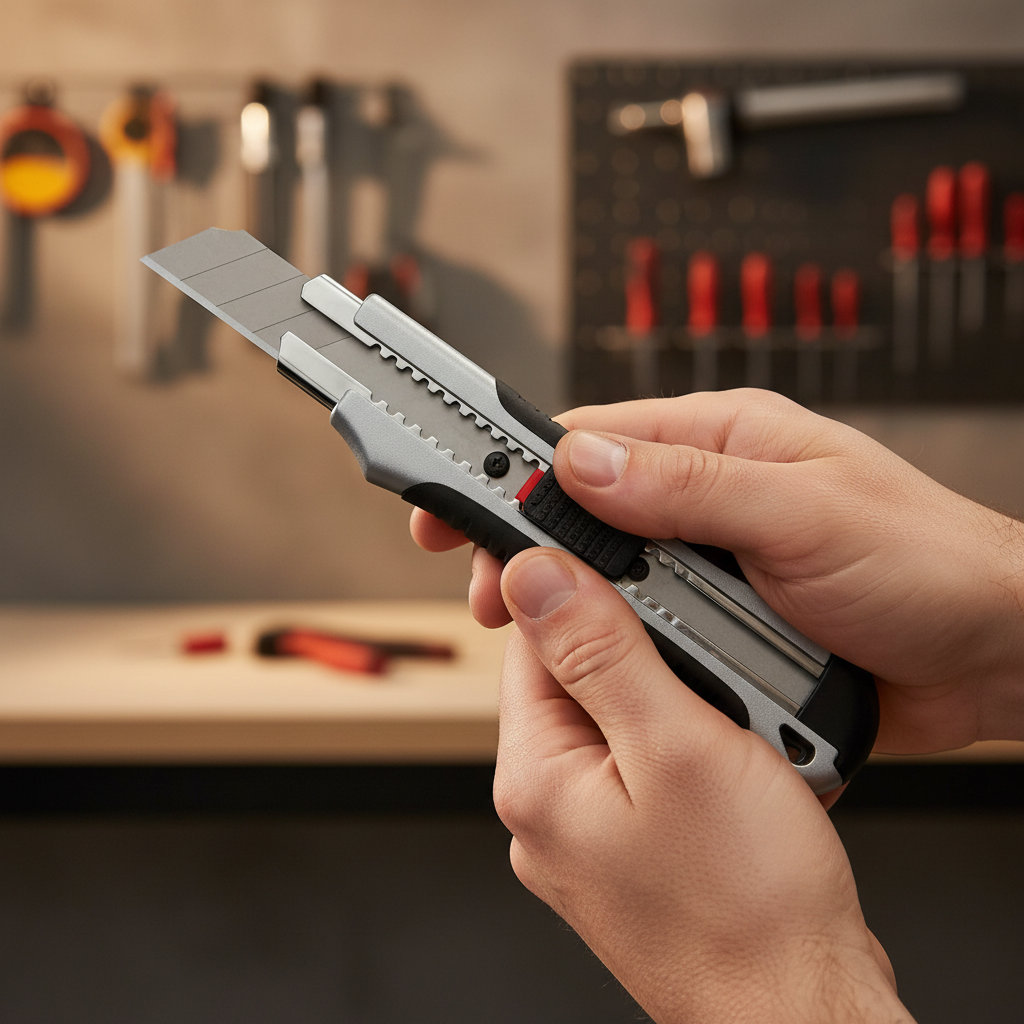
Retractable utility knife with tool-free release
- Retract the blade fully, then engage any lock if your model has one.
- Press the release button or lift the latch to open the body, or slide the top cover off.
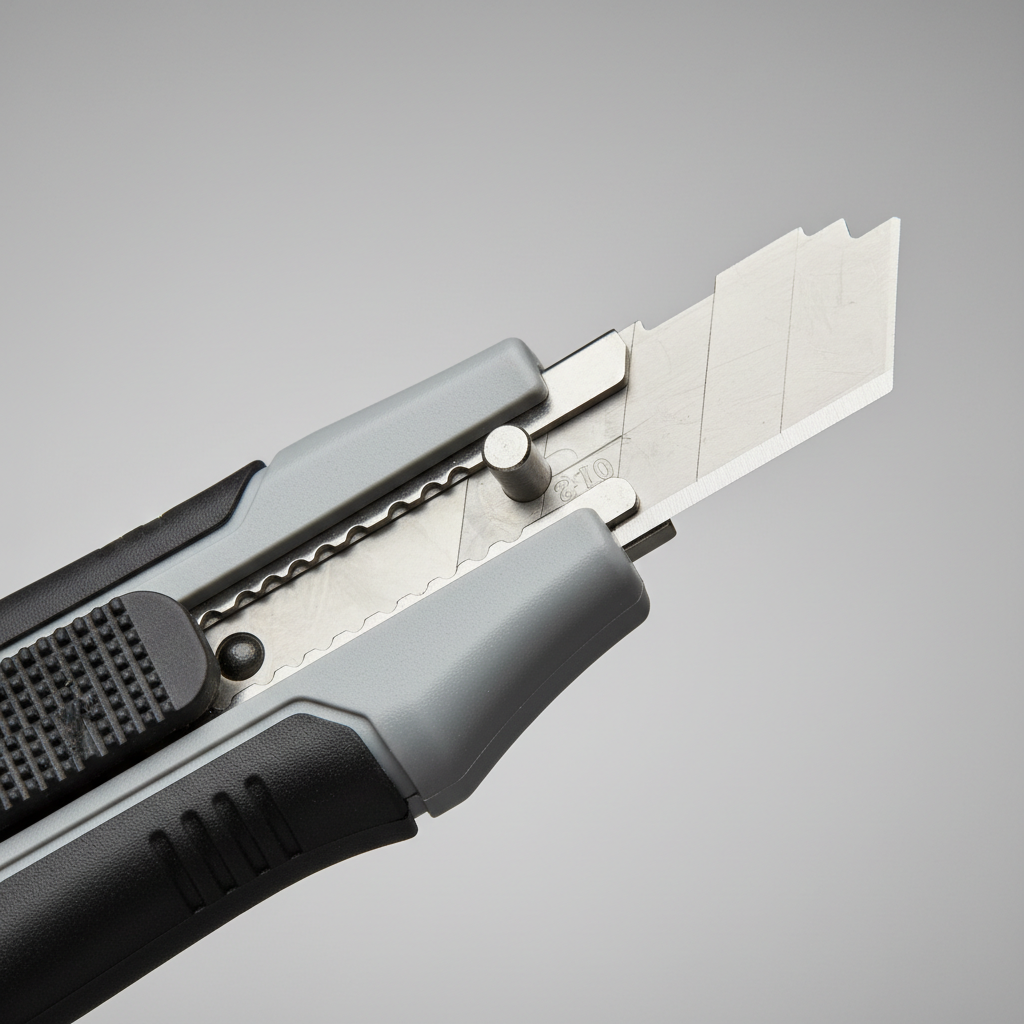
- Locate the blade carrier, many designs use a small metal holder or post.
- Lift the old blade out by the dull sides, keep it low over the table so it can’t drop far.
- Set the new blade onto the post or into the carrier notch, confirm it sits flat.
- Close the body until it clicks, then extend the blade slightly and retract it to confirm smooth travel.
Retractable utility knife that uses a screw
- Retract blade fully.
- Loosen the screw(s) just enough to release the clamp, avoid removing tiny hardware unless you must.
- Remove the blade, insert the new blade in the same orientation, align holes or notches.
- Tighten screws firmly, not aggressively, overtightening can crack plastic handles.
- Test extension and lock before cutting anything.
Folding utility knife (hinged body)
- Fold open the knife and engage any open-position lock.
- Use the quick-release lever or loosen the retention screw.
- Swap the blade, then confirm the blade is fully seated and centered.
- Close and reopen once to make sure nothing binds at the hinge.
Snap-off segmented blade knife
Segmented blades change differently, you don’t replace the whole blade every time, you break off a dull segment.
- Extend only one segment past the guide.
- Use the built-in snapper cap if included, or snap into a proper blade snap container.
- Apply pressure away from your body and away from anyone nearby, segments can fly.
- Retract after snapping, then extend to check the new edge is clean.
If the remaining blade gets short, open the handle and replace the entire segmented blade following the manufacturer’s layout.
A simple table: common problems and what usually fixes them
Most “my knife is broken” moments are either a mis-seated blade or debris in the track. Use this as a quick diagnosis.
| Problem | What it often means | Practical fix |
|---|---|---|
| Blade won’t extend smoothly | Debris or adhesive in slider track | Open body, brush out dust, wipe lightly, avoid soaking with oil |
| Blade wobbles | Blade not seated on post/notch, or clamp not tight | Reseat blade flat, retighten, confirm correct blade type |
| Release button stuck | Paint, drywall dust, or tape residue in latch | Clean around latch, gentle compressed air, don’t pry hard |
| Screw strips | Wrong driver or overtightening | Use correct bit, press straight down, replace screw if needed |
| Blade breaks while cutting | Twisting in the cut, wrong blade for material | Use a heavier blade, reduce side-load, score in multiple passes |
Practical tips that make blade changes faster (without getting sloppy)
Once you have the basics, speed comes from setup, not from rushing the moment your fingers are closest to the edge.
- Stage one spare blade on the table before you open the knife, especially on job sites.
- Rotate blades on a schedule if you do repetitive work, dull blades cause more force, and more force causes slips.
- Match blade to task: hook blades for roofing and carpet, heavy-duty blades for thick cardboard, standard blades for general cuts.
- Keep the knife clean: a quick wipe after cutting tape saves you the “stuck slider” problem later.
If you manage a crew, it’s worth standardizing on fewer knife models, fewer mechanisms means fewer “I can’t open this one” moments when someone borrows a tool.
Common mistakes and what to do instead
These show up constantly, even with people who use a utility knife every day.
- Mistake: changing blades mid-air while holding material. Do instead: set everything down, then swap.
- Mistake: testing sharpness with a thumb. Do instead: test on scrap material, one light pass tells you enough.
- Mistake: using pliers to force a jam. Do instead: open the housing and clear the track, forcing can bend the carrier.
- Mistake: tossing blades loose in trash. Do instead: use a blade bank or a sealed container, especially around kids and pets.
According to CPSC, sharp products and household hazards can contribute to injuries, so safe storage and disposal is worth treating like a normal part of the job, not an afterthought.
When it’s time to replace the knife or ask for help
If your knife repeatedly fails to lock, the blade carrier looks bent, or the body won’t close fully, continuing to use it can be risky, even if it “kind of works.” In workplaces, it’s usually smarter to swap the tool than to gamble on a compromised lock.
If you’re in a regulated job site or you’re setting up a safety process for a team, consider asking a supervisor, safety manager, or tool vendor rep for the exact procedure for your model, especially for auto-retracting knives and specialty blades.
Key takeaways
- Identify the mechanism first, then follow the correct release method.
- Retract and lock before opening anything.
- Seat the blade flat in the carrier, wobble means something is off.
- Dispose of blades safely, loose blades in trash create avoidable injuries.
Conclusion: make the swap boring, and you’ll stay consistent
how to change blade in a utility knife is one of those tasks where “boring” is the goal, a stable surface, the right blade, a clean seat in the carrier, then a quick function check before you cut. If you do just that, most problems disappear on their own.
Pick one knife you use most, learn its release method until it feels automatic, then set up a simple disposal habit for used blades, those two moves usually make the biggest difference.