
how to cut copper pipe with a pipe cutter comes down to two things most DIYers miss: a truly square start and patient, even tightening, not brute force.
If your cuts keep coming out angled, flattened, or full of sharp burrs, it usually isn’t “bad copper” or a cheap tool, it’s the setup, the wheel condition, or skipping prep that makes soldering and fittings harder than they need to be.
This guide walks you through the clean-cut workflow plumbers rely on, what to do when space is tight, and when you should switch tools. You’ll also get a quick checklist, a comparison table, and a few small habits that prevent leaks later.
What a “clean cut” really means for copper pipe
A clean cut is more than “the pipe is in two pieces.” For most home plumbing jobs, you want a cut that’s square, round, and deburred, because that’s what helps fittings seat correctly and keeps solder joints or compression fittings from fighting you.
- Square: the end is perpendicular to the pipe, so the pipe bottoms out evenly in a coupling or valve.
- Round: no ovaling or crushing, which can happen if you over-tighten too fast.
- Deburred: no sharp ridge inside or outside that can disrupt flow, shred an O-ring, or interfere with solder.
According to OSHA, hand and eye protection is a common-sense baseline for cutting operations because metal edges and flying debris can cause injuries, even on “small” tasks.
Tools and materials you’ll actually use (and what each one does)
You can do the core job with a standard tubing cutter, but a smoother finish often comes from pairing it with a couple small helpers.
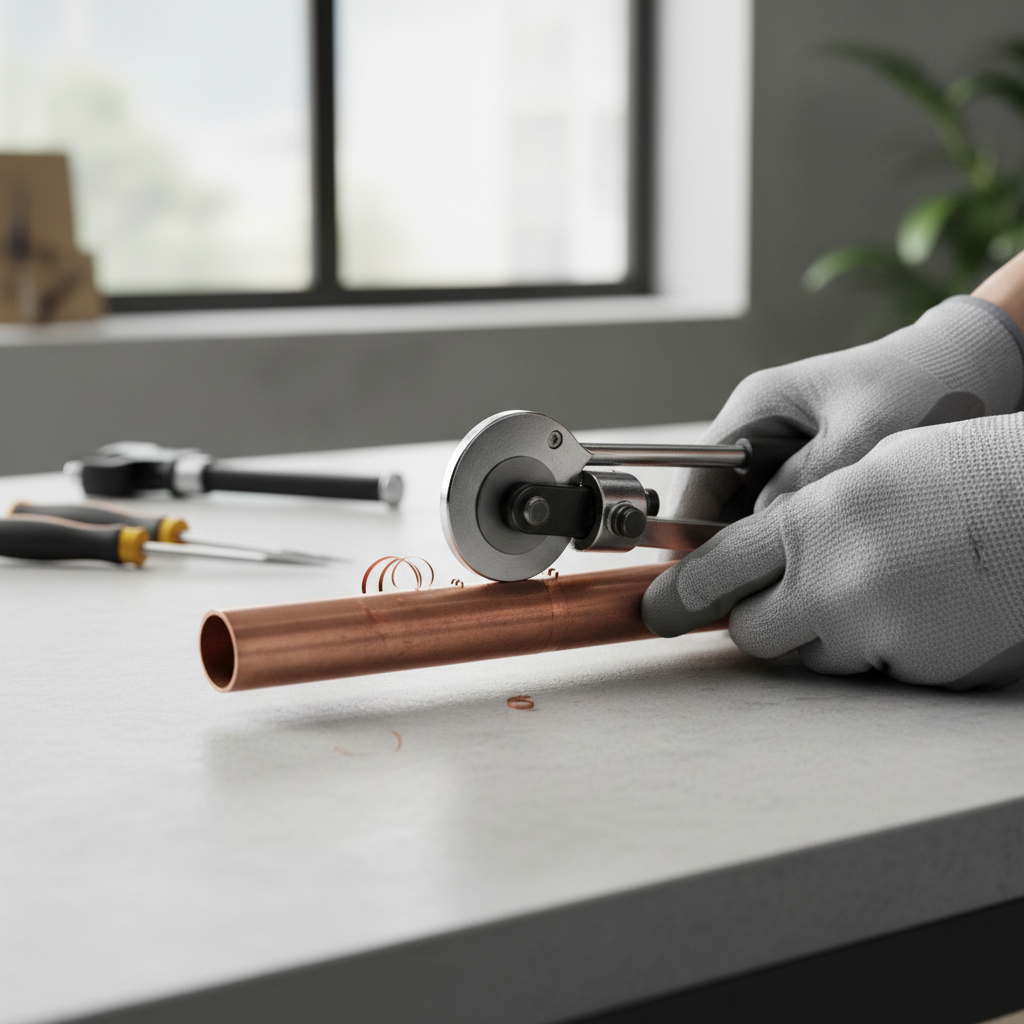
- Pipe cutter (tubing cutter): rolls a cutting wheel around the pipe, producing a straight cut when used patiently.
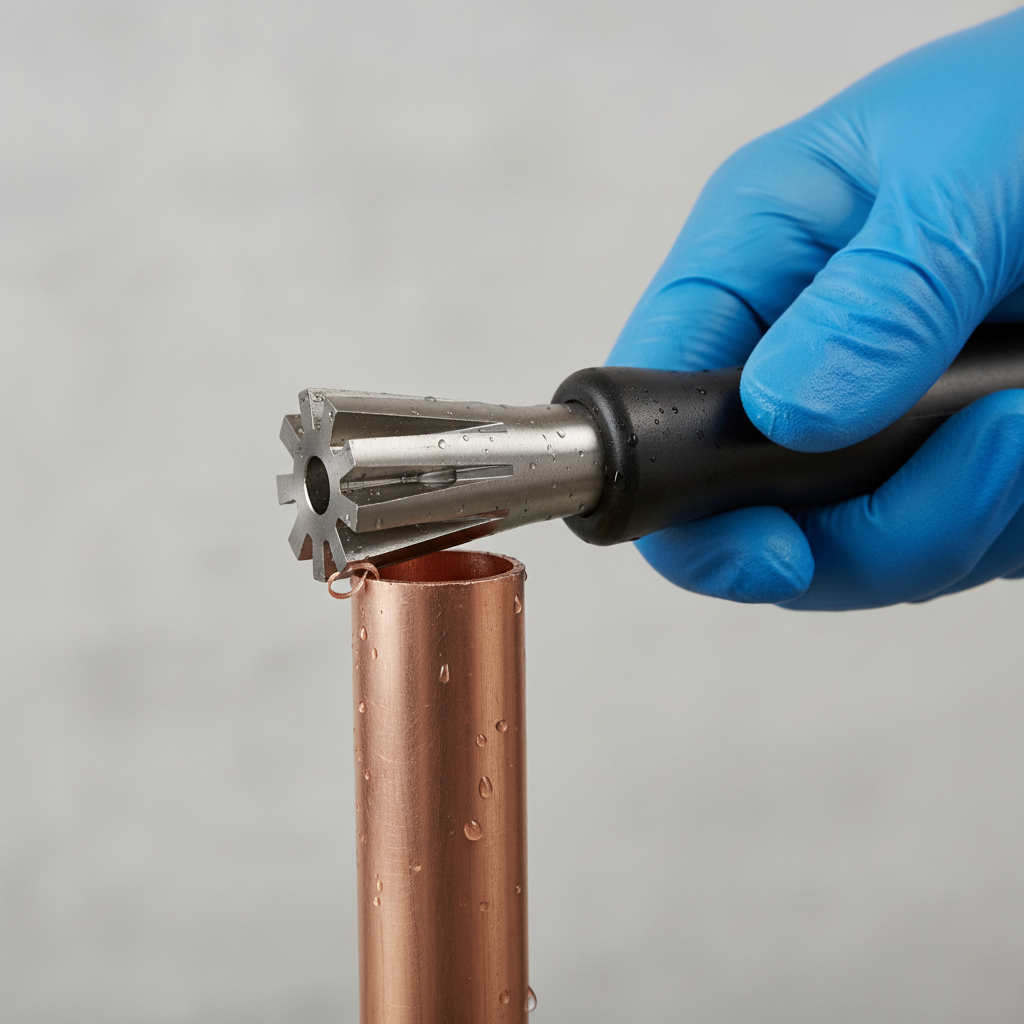
- Deburring tool / reamer: removes the inside ridge left after cutting, this step matters more than people think.
- Emery cloth or abrasive pad: cleans and lightly smooths the outside edge for soldering prep.
- Marker and tape measure: gives you a clear cut line and avoids “almost right” lengths.
- Optional: mini cutter: for tight spaces near studs, joists, or close to a valve body.
If your title mentions a “pipe cleaner,” that’s often a mix-up with pipe cutter. In plumbing, “pipe cleaner” usually means a chemical primer for PVC/CPVC or a cleaning brush, it doesn’t cut copper.
Step-by-step: how to cut copper pipe with a pipe cutter (clean and square)
This is the method that tends to work across most residential copper sizes. The pace matters, rushing is where copper starts to deform.
1) Measure twice, mark once, then check clearance
Mark the cut line clearly all the way around if you can, a quick wrap of painter’s tape can act like a visual “square” guide on the pipe.
2) Set the cutter on the mark, keep it square
Open the cutter, place the pipe in the jaws, align the wheel on your mark, then snug the knob until the wheel just bites. If the cutter sits at an angle now, the cut will stay angled later.

3) Rotate, tighten a little, rotate again
Turn the cutter around the pipe a couple full rotations, then tighten the knob a small amount, think “finger-tight plus a touch,” not “crank it.” Repeat until it separates. This is the heart of how to cut copper pipe with a pipe cutter without flattening it.
- If you hear squealing, a drop of light oil on the wheel can help, but keep oil away from areas you plan to solder, clean afterward.
- If the tool wobbles, stop and re-square it on the line.
4) Deburr the inside edge immediately
Use a reamer/deburring tool, spin until the ridge disappears. Many leaks and annoying fit issues start here, because the pipe can “hang up” before it seats fully.
5) Lightly dress the outside edge and prep for your connection
For soldering, a quick pass with emery cloth helps, for compression fittings, you mainly want a smooth, clean surface and a round end.
Quick self-check: which problem are you actually having?
If something keeps going wrong, it’s usually one of these. Run the list before buying more tools.
- Cut is angled: cutter started crooked, pipe wasn’t supported, or you tightened aggressively early.
- Pipe end is oval: over-tightening, especially on soft type M copper.
- Ragged edge / burrs feel huge: dull cutting wheel or skipping deburring.
- Cutter won’t turn smoothly: clearance issue, pipe not truly round, or wheel needs cleaning/lube.
- Length keeps ending up short: you measured to the wrong reference point on a fitting, very common around valves and stops.
If you’re working on existing plumbing, verify the pipe is fully drained and depressurized, leftover water can make soldering frustrating and, in some situations, may increase burn risk.
Pipe cutter vs. other ways to cut copper (use this table to choose)
Sometimes the cleanest job is simply using the right tool for the situation.
| Method | Best for | Pros | Watch-outs |
|---|---|---|---|
| Standard tubing cutter | Open access, most straight cuts | Square cuts, minimal mess | Needs rotation room around pipe |
| Mini tubing cutter | Tight spaces near framing | Fits where standard won’t | Slower, can be harder to keep square |
| Hacksaw | Very tight clearance, odd angles | Works almost anywhere | More burrs, easier to cut crooked, needs miter box or guide |
| Oscillating multi-tool (metal blade) | Cutting out sections, remodel work | Fast, good in tight spots | Heat, vibration, messy edge, deburring mandatory |
Real-world scenarios and fixes (tight spaces, old pipe, and rough cuts)
Most DIY jobs aren’t on a clean bench with perfect access. Here’s how to adapt without wrecking the pipe end.
Tight clearance near a wall or joist
- Switch to a mini cutter if you can still rotate it.
- If you can’t rotate at all, a hacksaw or oscillating tool may be the realistic choice, then spend extra time squaring and deburring.
- Support the pipe so it doesn’t chatter, vibration makes crooked cuts more likely.
Old copper that’s painted, corroded, or slightly out of round
- Clean a small band where the wheel will track, the cutter behaves better on a smooth surface.
- If the wheel keeps walking off the mark, start with a very light score, rotate once, then re-align.
- If the pipe is badly out of round, replacing that section may be safer than forcing a perfect cut.
Cut looks fine but the fitting won’t slide on
- Check the inside burr first, it can stop insertion earlier than you’d expect.
- Confirm you’re using the correct nominal size, 1/2-inch copper and 1/2-inch pipe thread are not interchangeable concepts.
- Lightly dress the outside edge, don’t “sharpen” it, you just want it smooth.
Safety, common mistakes, and small habits that prevent leaks later
Cutting copper is low drama until it isn’t. A few habits reduce rework.
- Wear eye protection: tiny slivers from deburring and sawing can travel farther than you think.
- Don’t over-tighten: flattening a pipe end can create slow leaks with compression fittings and make solder joints finicky.
- Always deburr: inside burrs can create turbulence and, in some systems, may contribute to noise or reduced flow.
- Keep solder surfaces clean: if you used oil on the cutter wheel, wipe the pipe with an appropriate cleaner before fluxing.
According to the Copper Development Association, proper tube preparation, including cleaning and reaming, supports sound joints for common copper tube connections.
When it’s smarter to call a pro
If the cut is part of a bigger repair, the risk often isn’t the cutting step, it’s what happens after.
- You can’t fully shut off or drain the line, and soldering is required.
- The pipe is close to combustible materials, or you’re working in a cramped cavity where heat shielding is tricky.
- You see signs of widespread corrosion or multiple pinhole leaks, one “simple cut” can turn into a larger replacement plan.
- You’re unsure whether the line is water, gas, or refrigerant, in those cases, stop and consult a qualified professional.
Practical wrap-up: a clean cut makes every next step easier
Once you get the rhythm, how to cut copper pipe with a pipe cutter feels almost boring, align it square, tighten slowly, deburr every time. That boring part is good, it means your fittings seat smoothly and you spend your time finishing the job, not wrestling it.
If you want one action to take today, replace a worn cutting wheel and add a simple deburring tool to your kit, those two upgrades usually beat “trying harder” with the same setup.