
How to replace battery in a work light usually comes down to one question, is your LED work light built with a user-replaceable pack or a sealed battery that’s meant for service, not DIY.
If you’ve ever had a light that “still charges” but dies in minutes, or one that won’t turn on unless it stays plugged in, you’re not alone, batteries fade gradually and the symptoms can look like a bad charger or a failed switch.
This guide walks you through the practical checks, the tools that actually help, and the swap process for common designs, including removable packs, internal packs with a connector, and sealed units where replacement may not be worth the risk.
Before you start: identify what battery system you have
Battery replacement gets easy or annoying based on the battery system, so don’t open anything until you know which category you’re in.
- Removable tool battery: many jobsite lights run on the same slide-on pack as drills and saws, you swap it like any other tool.
- Internal pack with connector: common in rechargeable flood/work lights, the pack is inside but plugs into the board with a small connector.
- Internal cells with spot welds: the housing opens, but the cells are welded together and sometimes welded to tabs, higher risk and more skill required.
- Sealed, non-serviceable: glued housing, no screws, “do not open” labeling, replacement often means replacing the whole light.
Quick tip: look for a model label near the handle or base, then search the model number plus “battery” or “replacement pack” before you take a screwdriver to it.
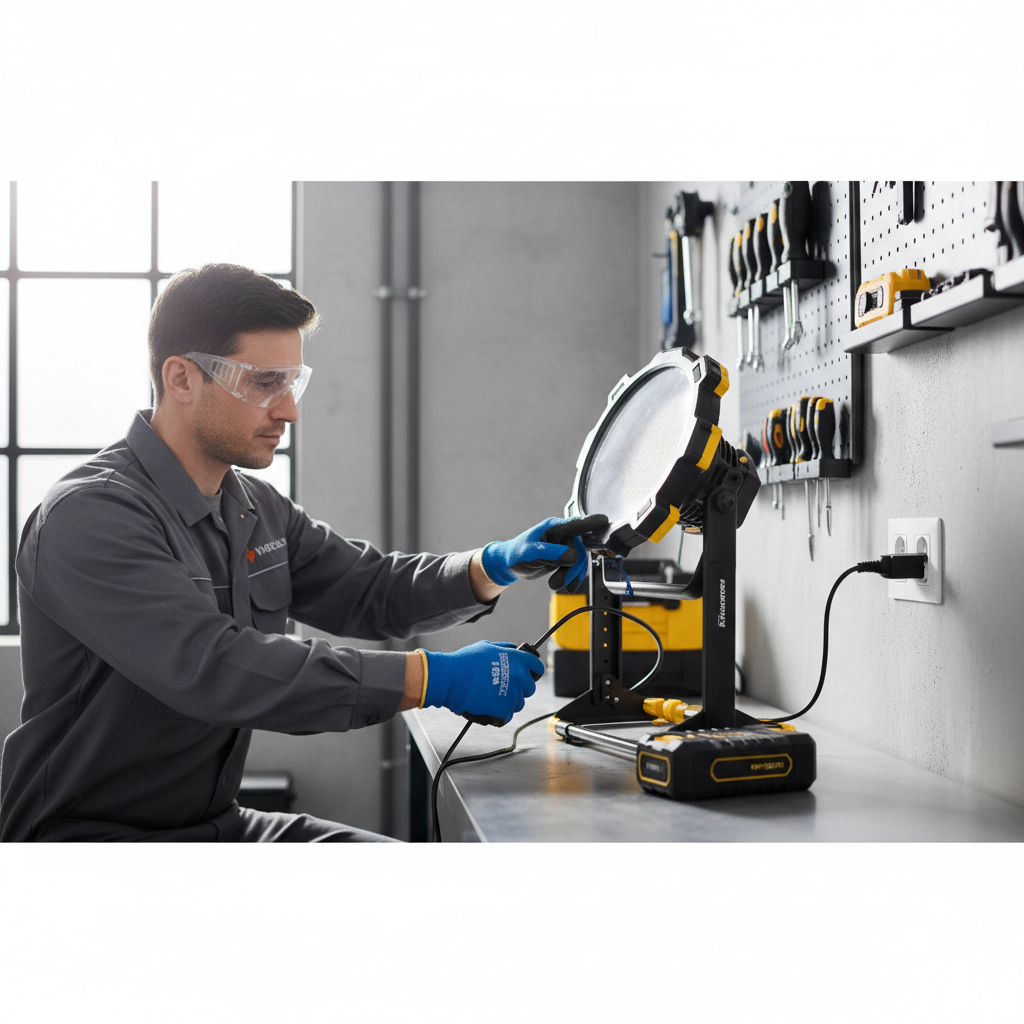
Safety and prep that keeps this from going sideways
LED work lights don’t sound scary, but the battery tech inside can be, especially lithium-ion packs. According to OSHA, employers and workers should follow manufacturer instructions and basic electrical safety practices when servicing powered equipment, which applies here even in a home garage setting.
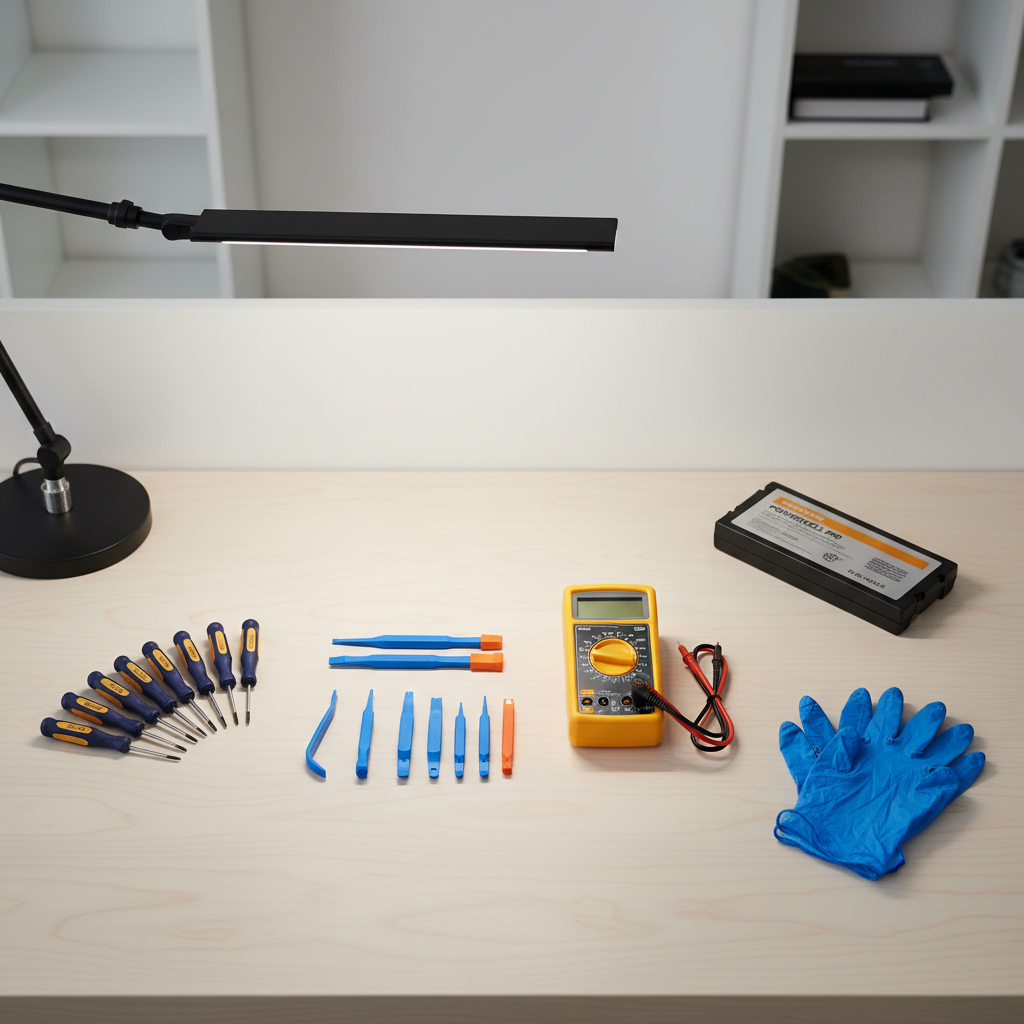
Use this short prep list, it prevents most “why did it spark” moments.
- Power off and unplug, remove any removable battery pack.
- Let it cool if it ran hot, heat plus lithium cells is a bad combo.
- Work on a clear surface, keep screws in a small tray so you don’t lose the odd one.
- Wear eye protection, especially if you suspect a swollen pack.
- Stop if you see swelling, leaking, or a sweet/solvent smell, move the light to a non-flammable area and consider professional help.
If your unit is under warranty, opening it may void coverage, it’s worth checking the paperwork first.
Quick self-check: battery problem or something else?
Before you decide how to replace battery in a work light, confirm the battery is the likely culprit, otherwise you can spend money and still have the same issue.
- Dies fast after a “full” charge: battery capacity faded, very common.
- Only works while plugged in: battery pack not holding charge, or the internal connector is loose.
- No charging indicator at all: could be charger, charge port, or internal fuse, not always the pack.
- Flickers under vibration: often a loose connector, cracked solder joint, or worn switch.
If you have a multimeter and the light uses an internal pack, you can often read pack voltage at the connector. A reading far below the pack’s rated voltage can indicate a deeply discharged or failed pack, but interpret cautiously because battery management circuits can block output when the pack is unhealthy.
Choosing the right replacement battery (and avoiding the sketchy ones)
This is where many replacements fail, the pack “fits” but doesn’t match the specs, or the protection circuit is cheap. Aim to match the original as closely as possible.
| What to match | Where to find it | Why it matters |
|---|---|---|
| Voltage (V) | Battery label, manual, light label | Wrong voltage can underperform or damage electronics |
| Chemistry (Li-ion, NiMH) | Battery label | Charging method differs, mixing is unsafe |
| Connector type | Visual match, model-specific part listing | For internal packs, wrong plug means no-go |
| Physical size | Measure old pack | Housing must close without pinching wires |
| Protection/BMS | Reputable supplier notes, OEM parts | Reduces risk of overcharge/overdischarge issues |
When in doubt, the safest route is an OEM pack or an equivalent from a reputable battery supplier. Ultra-cheap packs can work, but inconsistency is the real problem, you may not know what you’re getting until it fails.
Step-by-step: replacing a removable battery pack (tool-style)
If your light takes a slide-on battery, replacement is mostly about confirming compatibility and checking the terminals.
- Remove the old pack and inspect contacts, look for dark spots, melting, or greenish corrosion.
- Blow out dust, wipe terminals with a dry microfiber cloth, avoid soaking anything in solvents.
- Insert the new pack, confirm it latches firmly with no wobble.
- Test on low and high modes, then test again after 10 minutes, weak packs often sag under sustained load.
If the light still cuts out, try another known-good battery from the same platform, many “battery” complaints end up being a worn latch, dirty contacts, or a damaged battery rail inside the light.
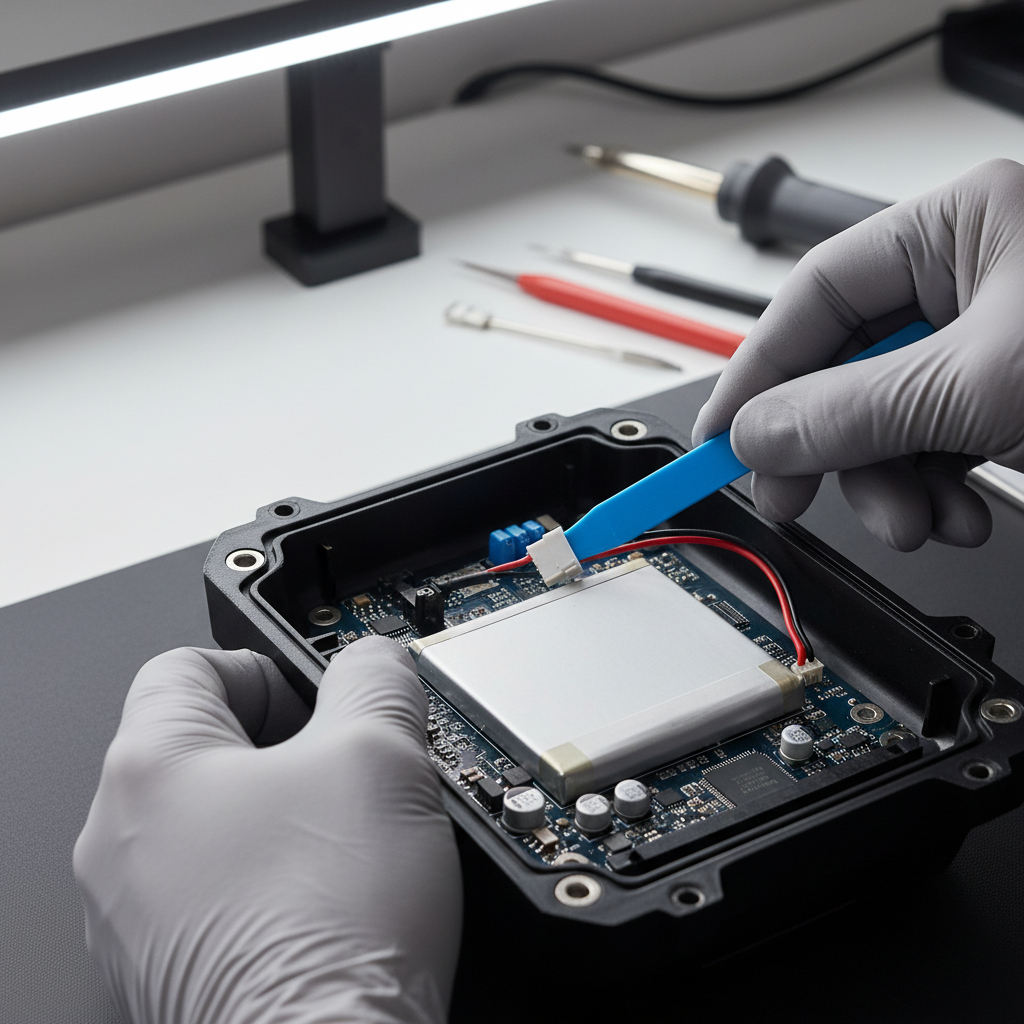
Step-by-step: replacing an internal battery pack (screws + connector)
This is the most common DIY-friendly design for rechargeable LED work lights. Take photos as you go, it sounds trivial but it saves you when routing wires back through tight channels.
1) Open the housing without damaging seals
- Remove rubber feet, stickers, or plugs hiding screws.
- Use the correct bit to avoid stripping, some brands use security Torx.
- Separate halves gently with a plastic pry tool, go slow around clips.
2) Disconnect the pack safely
- Locate the battery connector on the board, pull on the plug, not the wires.
- If there’s adhesive foam holding the pack, peel it slowly to avoid bending cells.
3) Install the replacement
- Match orientation, keep wires routed exactly as before so nothing pinches.
- Reconnect the plug firmly, you should feel a clean “seat,” not a mushy half-connection.
- Reassemble the housing, tighten screws evenly, don’t crank them down and crack plastic.
4) Test and calibrate expectations
Charge fully, then run the light for a reasonable interval to confirm stability. If the indicator behaves oddly, it may be normal during the first cycle, but repeated overheating, blinking error patterns, or a hot pack suggests you should stop and reassess.
Common mistakes that cause repeat failures
Most repeat breakdowns come from small errors, not “bad luck.” A few are worth calling out.
- Mixing up chemistry: swapping NiMH for Li-ion or vice versa can create charging problems and safety risks.
- Pinched wires: the light works, then fails later when vibration cuts insulation.
- Using a higher-voltage pack “because it’s brighter”: driver circuits may not tolerate it.
- Skipping the connector check: a loose plug mimics a dead battery, especially when you move the light.
- Ignoring heat: if the pack runs unusually hot, stop using it and investigate.
If your light has an external charge port, also inspect the port solder joints and cable strain relief, intermittent charging often starts there.
When DIY battery replacement isn’t the right call
Sometimes the smartest “repair” is to stop. According to NFPA, lithium-ion battery incidents can involve fire risk when cells are damaged or improperly handled, so a cautious approach is reasonable even for small packs.
- Swollen or leaking pack: don’t puncture or compress it, consider a battery recycler or qualified repair shop.
- Spot-welded cell rebuild required: this can be done, but it needs the right equipment and know-how.
- Cracked housing near the battery: impact damage can compromise insulation and mounting.
- Repeated charging faults: the problem may be the charging board, not the pack, diagnosis gets more technical.
If you’re unsure, a local tool repair center, electrician, or manufacturer support line can help you confirm parts and safety steps, especially for high-capacity packs.
Key takeaways and a simple next step
Key takeaways: Most people solve how to replace battery in a work light by identifying the battery system first, matching voltage and connector exactly, and reassembling carefully so wires stay protected.
If you want a clean next move, start by finding the model number, then source a pack that matches the original specs, once the replacement arrives, set up a clear workspace and take a few photos before you unplug anything.
If you hit resistance, stripped screws, glued seams, or signs of battery damage, pausing and getting qualified help often costs less than fixing a bigger problem later.