
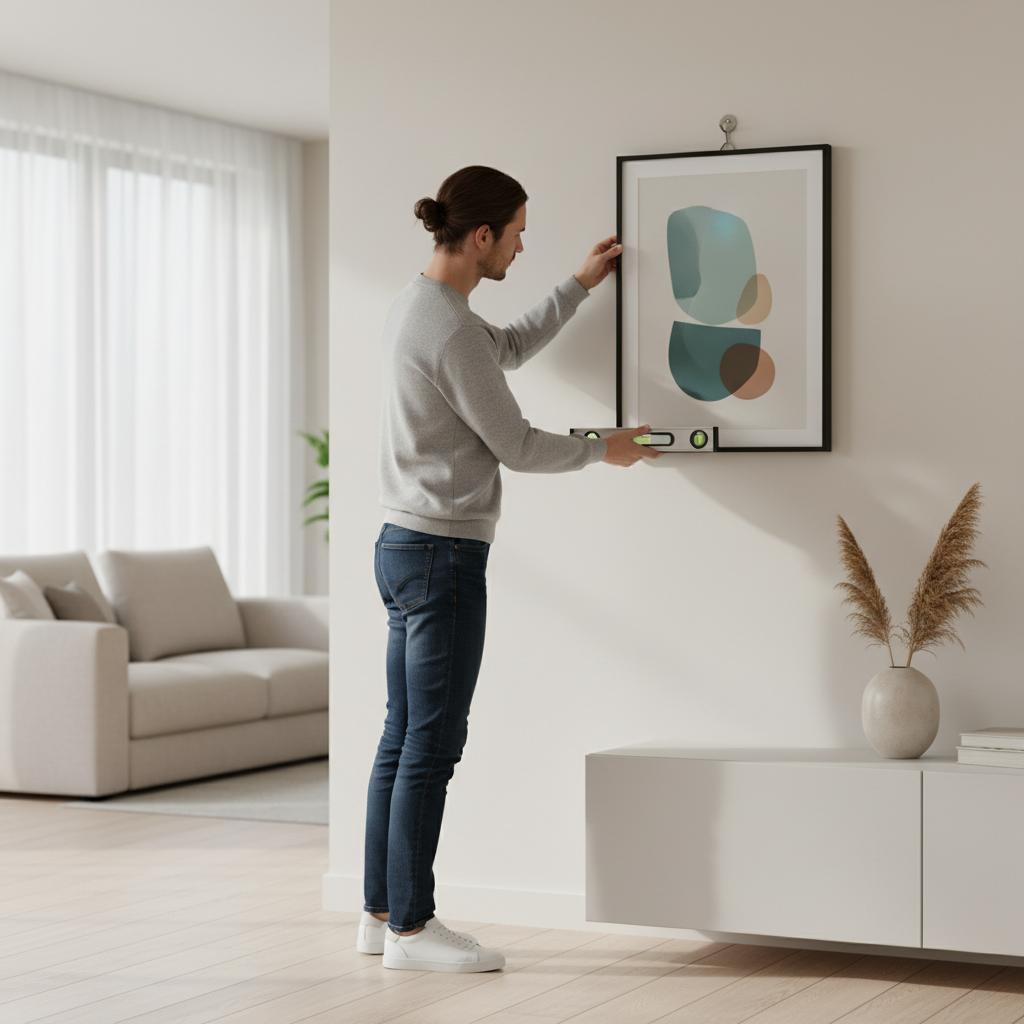
Level tool small magnetic sounds like a niche gadget, until you’ve hung a frame that looks straight up close but somehow tilts from across the room. If you hang pictures even a few times a year, a tiny magnetic level can save a lot of re-hanging, extra nail holes, and frustration.
The appeal is simple, you want something that fits in a drawer, snaps onto metal hardware, and lets you work solo without holding a long level and the frame at the same time. The catch is that not every small magnetic level behaves the same, and walls are rarely as square as we wish.
This guide breaks down when a compact magnetic level actually helps, what features matter, and a practical step-by-step method for common hanging setups, including D-rings, sawtooth hangers, and wire.
Why small magnetic levels help (and when they don’t)
A small magnetic level earns its keep when your hands are busy, your hardware is metal, and you need a fast yes-or-no read. It’s not magic, though, and a few real-world annoyances can throw you off.
- Hands-free alignment: magnet grabs a nail head, screw, steel hook, or bracket, so you can adjust the frame without juggling a long level.
- Quicker micro-adjustments: tiny tilt corrections are easier to see when the bubble is close to the hanger point.
- Better for tight spaces: narrow walls, gallery clusters, corners, and shelves where a 24-inch level feels clumsy.
Where it often disappoints, non-magnetic hardware (plastic sawtooth, adhesive hooks), thick powder-coated hangers with weak attraction, and uneven frame backs that stop the tool from sitting flat.
What to look for in a level tool small magnetic
Most options look similar online, but a few details change how confident you’ll feel on the wall.
Key features that matter
- Strong magnet: you want a firm “snap” on nails/screws, not a weak slide that drifts while you step back.
- Readable vial: a bright bubble and clear center marks beat a fancy body you can’t read in dim light.
- Flat reference surface: one true flat edge makes it usable even when magnetism isn’t involved.
- Length that matches the job: 3–6 inches is usually the sweet spot, smaller can get twitchy, longer becomes awkward for tight clusters.
- Durable housing: drops happen, especially on ladders, so a sturdy body matters more than a glossy finish.
A quick comparison table
| Type | Best for | Upside | Trade-off |
|---|---|---|---|
| Mini magnetic torpedo level | General hanging, metal hooks/brackets | Stable, easy to read | Can’t attach to non-metal points |
| Magnetic line level | Leveling wire/cord lines | Great for marking a straight run | Less helpful for a single frame |
| Compact non-magnetic pocket level | Frame top edge checks | Works on wood/plastic surfaces | Not hands-free |
Fast self-check: are you fighting the wall or the hanger?
Before you blame your tool, figure out what’s actually causing the tilt. This is where people burn time, they keep re-leveling the frame when the problem is the anchor or the hardware geometry.
- Bubble shows level but frame looks off: wall corners or trim lines might be out of square, trust the level, not the ceiling line.
- Frame shifts after you let go: hanger point is sloppy (oversized hole, loose D-ring, wire sliding).
- Looks level, then slowly droops: nail/screw angle, soft drywall, or a heavy frame with insufficient anchor.
- Two-frame pair never matches: spacing/height marks are inconsistent, measure from the same reference point each time.
If you suspect the wall itself is uneven, check your level against another level or a smartphone level app. If they disagree dramatically, the vial could be out of calibration or you’re not placing it on a true flat surface.
How to use it for common picture-hanging setups
Using a compact magnetic level is less about “stick it on and done” and more about placing it on the same reference every time, so you aren’t chasing tiny variations.
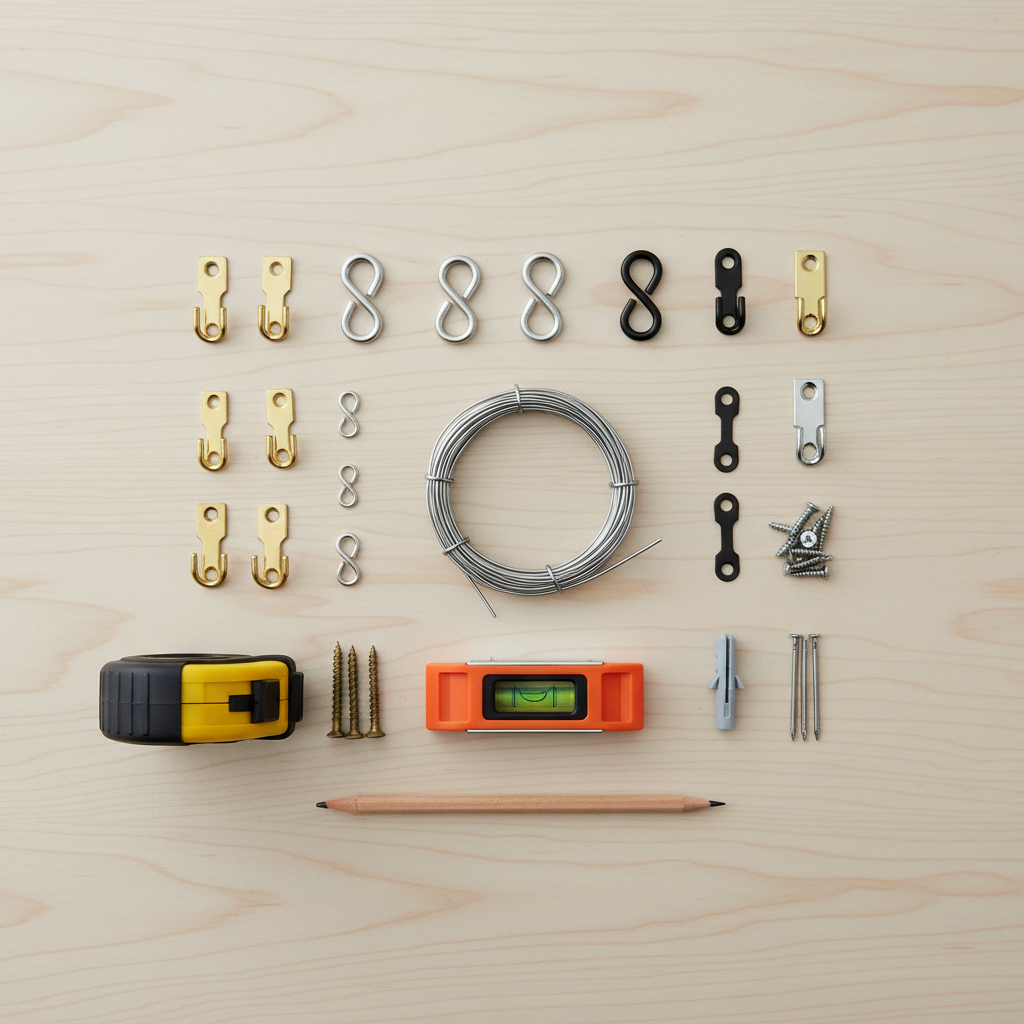
1) Single nail or screw with a metal hook
- Install the hook or screw at the intended spot, leave enough projection for the hanger to seat properly.
- Attach the small magnetic level to the metal hook body or directly to the screw head if it holds steady.
- Adjust the screw angle slightly if needed, you want the hook sitting straight, not twisted.
- Hang the frame, then do a final bubble check by touching the level to the frame’s top edge (flat surface method) if magnet placement feels unreliable.
2) Sawtooth hanger
Sawtooth hangers are usually non-magnetic, so you use the tool like a mini straightedge.
- Hold the level on the top frame rail, not the sawtooth teeth.
- Once it reads level, lightly mark the wall at the nail point through the hanger slot.
- Drive the nail and re-check after hanging, sawtooth can seat differently depending on which tooth catches.
3) Wire hanging (D-rings + wire)
- Mark the centerline on the wall, then measure the drop from the top of the frame to the wire at tension.
- Use the level to keep your mark line true, then install two hooks if the frame is wide or tends to twist.
- After hanging, nudge the frame left/right to balance wire tension, then verify level on the top rail.
According to CPSC (U.S. Consumer Product Safety Commission)... when you’re mounting heavy items, choosing appropriate anchors and following manufacturer instructions helps reduce tip-over and fall hazards. If a frame feels borderline heavy for drywall, it’s worth slowing down and picking the right anchor rather than relying on a tiny tool to “compensate.”
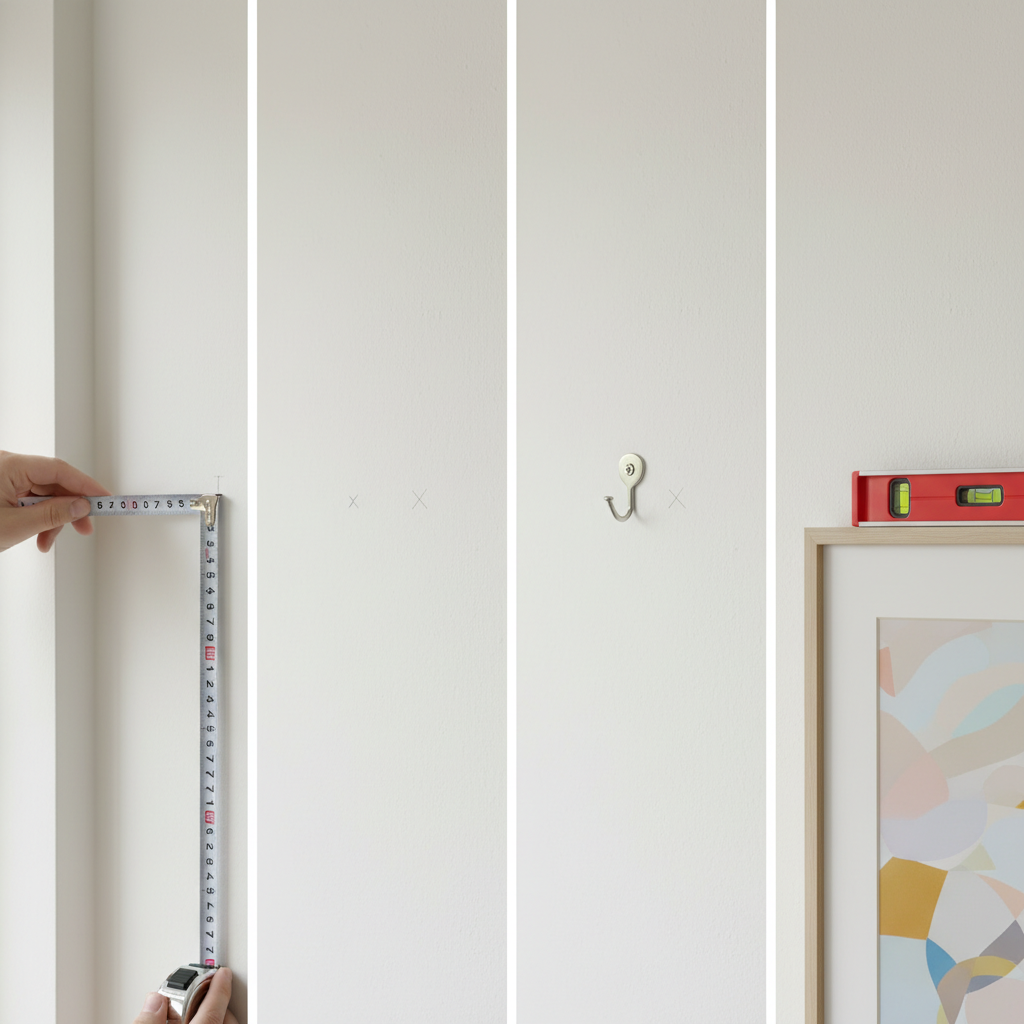
A practical workflow that avoids extra holes
This is the part most people skip, not because it’s hard, but because it feels like overkill until you’ve patched the same spot twice.
- Decide the visual reference: eye level, furniture line, or a grid for a gallery wall, pick one and stick to it.
- Measure from frame top: don’t measure from the hanging wire alone, it changes with tension.
- Make one light mark: pencil only, no pen, and avoid over-marking “fuzz” that makes you second-guess.
- Set hardware, then level-check: verify the hook/screw orientation before the frame goes up.
- Hang and fine-tune: do the last check on the frame edge, not the hanger, if the magnet point is tiny or unstable.
Key point: if your tool only touches a tiny metal spot, it can read “level” while the hook is slightly rotated. When in doubt, confirm with a second reference on the frame itself.
Mistakes that make the bubble lie
Most “my level is wrong” moments come from placement and assumptions, not a defective vial.
- Trusting trim/ceiling lines: many homes have subtle slope, your eye loves straight lines even when they’re not level.
- Leveling the wrong surface: ornate frames can have a top edge that isn’t truly parallel to the art opening.
- Magnet on a curved screw head: the tool can rock, giving a different reading each time you touch it.
- Ignoring hanger slop: wire, D-rings, and keyholes all have play, a perfect bubble won’t stop post-hang drift.
- Using a tiny level on a large frame only once: check left and right top corners too, large frames can be slightly warped.
When it’s smarter to get help (or upgrade tools)
A level tool small magnetic is great for everyday frames, but some situations deserve a different approach.
- Heavy mirrors, big art, or glass-front frames: consider wall studs, rated anchors, or a pro installer, falling objects can cause injury.
- Brick, plaster, tile: drilling and anchors vary by substrate, if you’re unsure, ask a hardware pro or contractor.
- Gallery walls with tight spacing: a laser level or longer level plus a layout plan usually reduces rework.
- Repeatedly inconsistent readings: the level vial may be out of calibration, swapping tools is often cheaper than wasting time.
If you have any doubts about structural support or you’re mounting above beds/cribs, it’s reasonable to consult a qualified handyman or installer for safer hardware choices.
Conclusion: a small tool, but it rewards good habits
A compact magnetic level works best when you treat it as a fast checkpoint, not the only source of truth. Use it to steady metal hardware, confirm with a flat-edge check on the frame, and you’ll get straighter results with fewer wall repairs.
If you want one action step, pick a consistent measuring method (from frame top is usually simplest), then do a quick double-check after the frame settles. That small pause is what keeps “close enough” from turning into “why does it look crooked.”
FAQ
What is the best way to use a level tool small magnetic for picture hanging?
Attach it to a stable metal reference like a steel hook or screw head, then confirm level on the frame’s top edge. Using both checks helps when the magnet point is tiny or the hook can rotate.
Why does my frame look crooked even when the bubble is centered?
Often the wall lines (ceiling, trim, tile grout) are slightly off, or the frame itself isn’t perfectly square. In those cases, you may choose visual alignment to a dominant line, but be aware it can conflict with true level.
Can a small magnetic level stick to picture wire?
Usually no, most picture wire isn’t magnetic enough for a reliable hold. You can still use the tool on the frame edge, or consider a line level or laser for wire-based layouts.
Do I need a magnetic level if I already have a smartphone level app?
A phone app can work for checking the frame edge, but it’s not hands-free and it’s easy to scratch frames or slip. A small magnetic tool is handy when you want quick alignment on metal hardware.
How do I stop a picture from drifting out of level over time?
Reduce play at the hanger point, use two hooks for wider frames, and make sure the nail/screw angle seats the hardware firmly. If the wall material is soft, a better anchor may be needed.
Is it safe to hang heavy frames using only one nail if it’s level?
Level doesn’t equal secure. For heavier items, follow the hanger or anchor manufacturer guidance and consider studs or rated anchors, when unsure, asking a professional is sensible.
How small is too small for a magnetic level?
Very tiny levels can feel twitchy because small movements swing the bubble quickly. Many people find 3–6 inches easier to read while still fitting tight picture-hanging spaces.
If you’re trying to hang a set of frames quickly and want fewer do-overs, it can help to pair a compact magnetic level with a simple layout routine and the right hangers for your wall type, that combo usually saves more time than buying yet another tool.