
wire cutters stripper tool problems usually show up the same way, crushed insulation, nicked copper, loose terminals, and a job that looks “fine” until it fails later. The fix is rarely more force, it’s usually the right tool style, the right gauge setting, and a repeatable technique.
If you do DIY wiring at home, work on automotive projects, or handle low-voltage installs, a dependable cutter-stripper is one of those tools that quietly decides whether your connections feel solid or sketchy. Clean strips help terminals bite correctly, clean cuts help routing stay neat, and both reduce rework.
This guide breaks down what actually matters when buying and using one, what to avoid, and how to get consistent results without overthinking it. If you already own a tool and it “kind of works,” you’ll also find quick checks that explain why it still causes frayed strands or weak crimps.
Why wire cutting and stripping goes wrong in real life
Most wire issues come from small mistakes that stack up, and the tool choice can either hide those mistakes or amplify them.
- Wrong cutting edge for the wire type: some cutters shear cleanly on copper but mash aluminum or harder alloys, leaving an oval end that won’t seat well.
- Stripping blades not matched to gauge: too loose pulls insulation without fully cutting, too tight nicks strands and reduces conductor strength.
- Mixing solid and stranded technique: solid wire tolerates a cleaner “single bite,” stranded often needs gentler pressure and a controlled pull to avoid strand loss.
- Dull jaws: even decent tools get sloppy if they cut staples, nails, or steel wire “just this once.”
- Rushing the pull: twisting the tool as you pull insulation off can score copper, especially on smaller gauges.
According to OSHA, employers must provide tools that are “safe and properly maintained,” and that mindset applies at home too, a worn stripper can turn into an injury risk or a reliability risk when you least expect it.
Types of wire cutter & stripper tools (and who they’re for)
“Wire cutter and stripper” can mean several designs. Picking the right category often matters more than the brand.
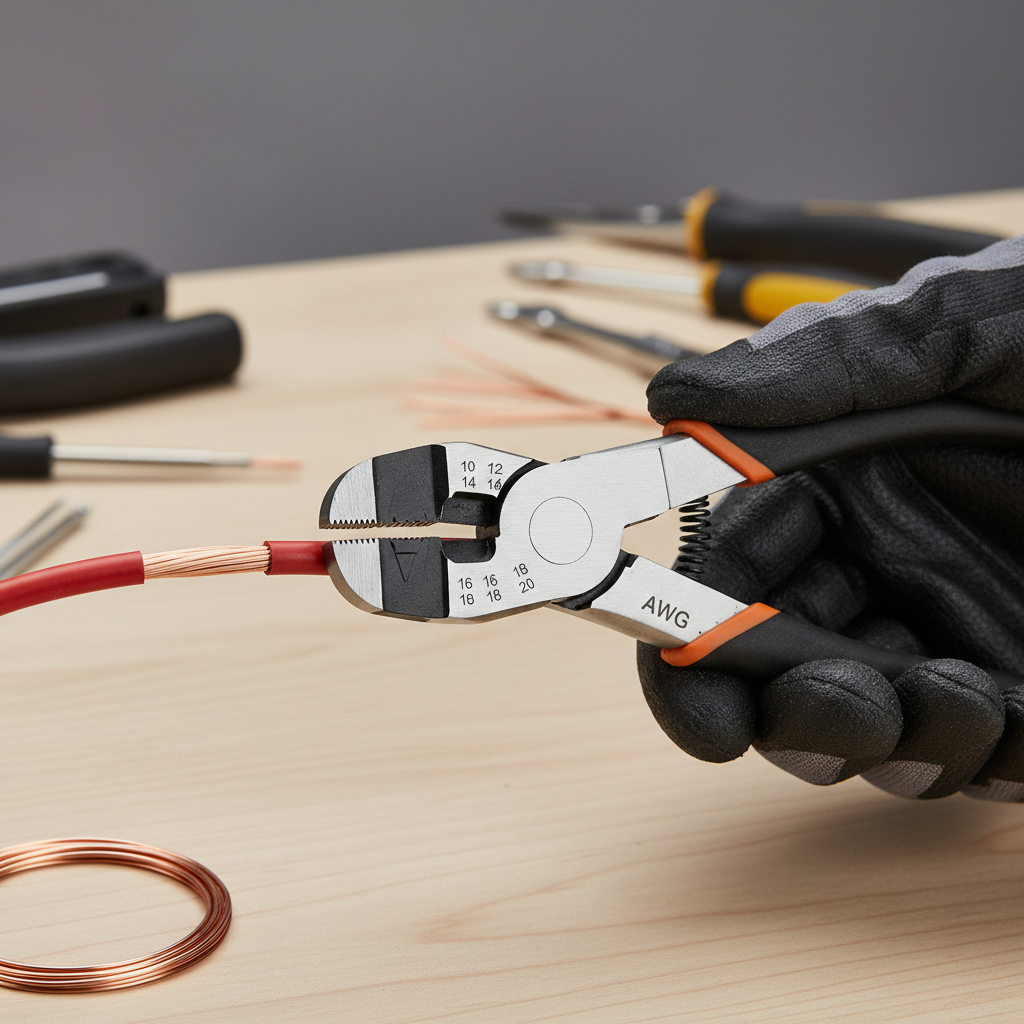
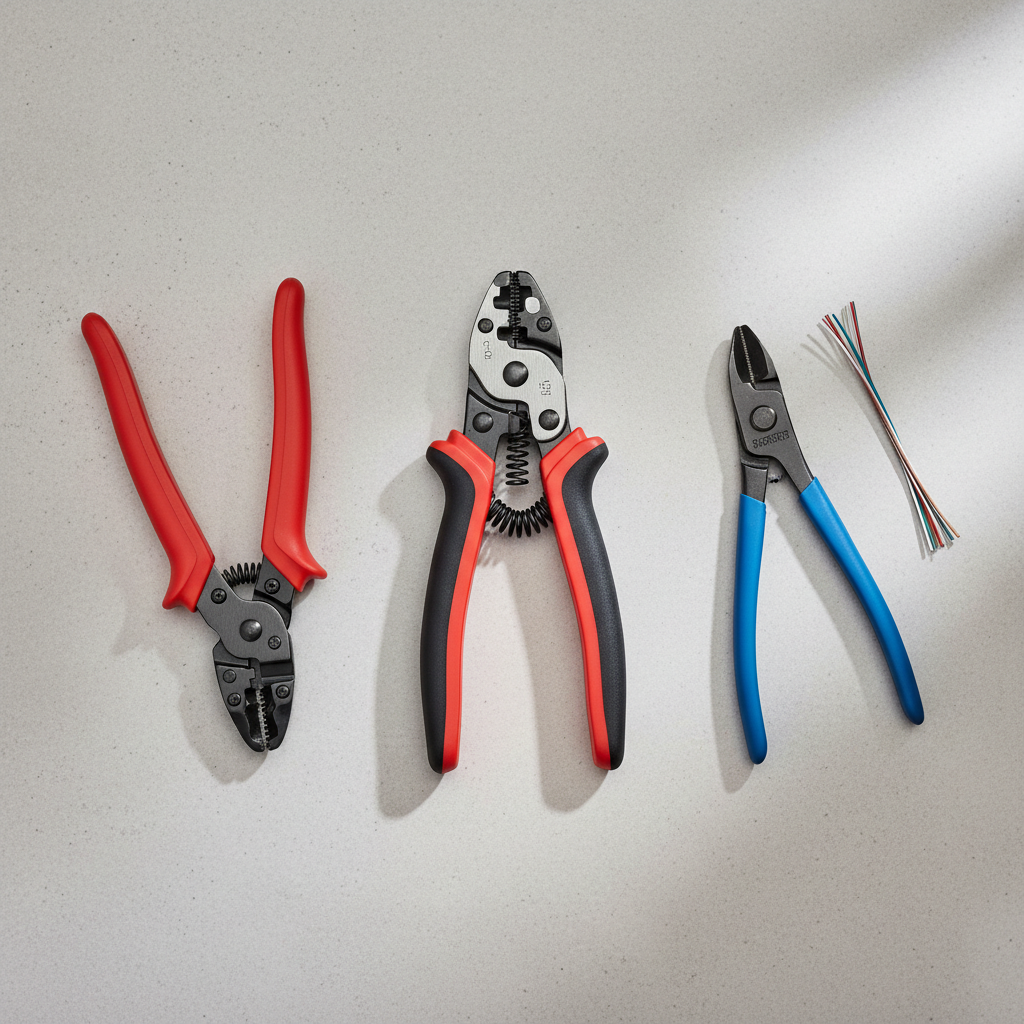
Manual combination cutter/stripper
Classic plier-style tools with gauge holes, a cutter near the hinge, and sometimes a crimper. They’re affordable and compact, but they demand a steady hand.
- Good for: occasional household wiring, kits, glovebox tools
- Watch for: inconsistent strips if you’re not careful with gauge selection
Self-adjusting (automatic) strippers with cutter
These clamp and strip in one squeeze. They’re fast and forgiving, especially if you strip a lot of similar wire daily.
- Good for: repetitive work, beginners, low-voltage installs
- Watch for: very short strip lengths, extra-thick insulation, or odd jacket materials
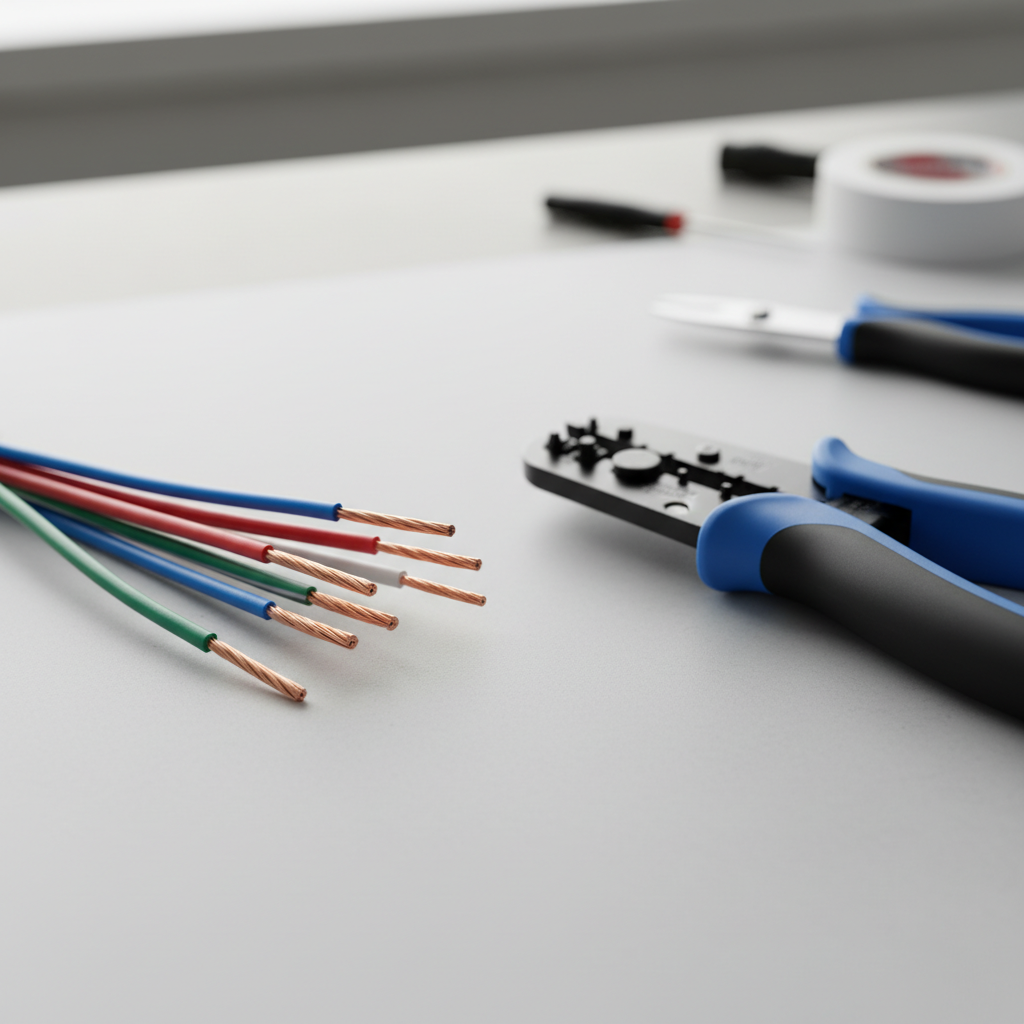
Precision strippers (electronic/mini-gauge)
Better control for small conductors and delicate work, where a nicked strand is a real problem.
- Good for: electronics, RC, small appliances
- Watch for: limited range, not ideal for household 12/14 AWG tasks
Quick self-check: what tool (or setting) do you actually need?
If you answer these in a minute, you’ll avoid buying the “wrong right tool.”
- Wire type: mostly solid (Romex conductors), stranded (appliance cords), or both?
- Common gauges: 10–14 AWG (circuits), 16–22 AWG (devices/low voltage), or smaller?
- Insulation: standard PVC, thick jacketed, silicone, or specialty?
- Volume: a few strips per month, or 50+ per day?
- Connection style: screw terminals, crimp connectors, ferrules, wire nuts, or a mix?
Here’s the practical shortcut: if you mostly do household work in common AWG sizes and want a compact tool, a quality manual combo usually holds up. If you strip lots of stranded wire and hate rework, a self-adjusting model often pays for itself in time saved.
Buying checklist: features that matter (plus a comparison table)
Most listings look similar. These details are what usually separate “works okay” from “works every time.”
- Gauge range clearly marked (AWG) and realistic for your jobs
- Clean cutter geometry that doesn’t crush wire ends
- Jaw alignment with minimal side-to-side play at the hinge
- Replaceable blades (common on automatic strippers)
- Strip length stop if you need consistent results for terminals
- Comfortable grips if you work long sessions, hand fatigue is real
| Tool style | Best use | Pros | Tradeoffs |
|---|---|---|---|
| Manual combo cutter/stripper | General home electrical | Compact, durable, simple | Technique-sensitive, slower for volume |
| Self-adjusting stripper w/ cutter | Repeat stripping, stranded wire | Fast, consistent, beginner-friendly | Bulkier, can struggle with odd insulation |
| Precision small-gauge stripper | Electronics and delicate conductors | Excellent control, less strand damage | Narrow range, not for larger household wire |
How to cut and strip cleanly (step-by-step, no fluff)
wire cutters stripper tool technique is mostly about consistency, and consistency comes from doing the small steps the same way each time.
1) Make the cut count
- Cut at 90 degrees to the wire for a flat end.
- If the end looks oval or mashed, don’t “force it into place,” recut with a better bite.
2) Pick the gauge setting, then test once
- Match the AWG hole or dial to the conductor, not the insulation thickness.
- Do one test strip on a scrap piece, you want insulation to slide off with a light pull, and copper should look smooth, not scored.
3) Strip with steady pressure, not a twist
- Clamp, then pull insulation straight off.
- On stranded wire, keep the conductor straight so strands don’t splay.
- If you see missing strands, size up the gauge setting and try again.
4) Finish the end for the connector you’re using
- For screw terminals: keep strands together (or use ferrules where appropriate).
- For crimp terminals: strip length should match the barrel, copper shouldn’t be exposed beyond the crimp in most cases.
- For wire nuts: avoid over-stripping, too much bare copper increases the chance of shorts.
Safety, code, and “should I call a pro?” moments
Wire work looks simple until it isn’t, and a clean strip doesn’t automatically mean a safe installation.
- De-energize and verify: use an approved tester, and if you’re unsure, pause. According to NFPA, electrical safety depends heavily on controlling exposure to energized parts, which is why verification matters, even for “quick fixes.”
- Match wire and connector ratings: mixing wire sizes or using the wrong connector type can create heat buildup.
- Damaged conductor: if you nick copper on a circuit conductor, many electricians will re-strip to clean metal or re-terminate, because a scored conductor can weaken over time.
Consider a licensed electrician if you see repeated breaker trips, warm outlets, burning smells, aluminum branch wiring, or if the project involves a panel, service entrance, or anything you can’t confidently verify. Local code requirements vary, so permits and inspections may apply depending on your area.
Common mistakes that waste time (and how to avoid them)
Most frustration comes from a few habits that feel minor in the moment.
- Using the cutter on “whatever”: cutting nails, steel wire, or cable ties can ding the edge fast, keep a beater cutter for abuse.
- Over-stripping: extra bare copper rarely helps, it usually creates clutter in boxes and raises short risk.
- Undercutting insulation: if you don’t fully score the jacket, you’ll yank strands with it.
- Assuming all AWG markings mean the same thing: some tools mark solid vs stranded differently, check the tool’s legend.
- Ignoring feel: if the tool suddenly needs more force than usual, something’s off, alignment, dullness, or wrong hole.
Care and maintenance that keeps performance consistent
A decent wire cutter/stripper can last a long time if it stays clean and sharp.
- Wipe jaws after work, especially if you strip adhesive-lined or grimy wire.
- Add a tiny drop of light oil at the pivot if action feels gritty, then wipe excess.
- Store dry, corrosion on edges quickly turns into rough cuts.
- If you use a self-adjusting unit, check blade wear and replace if the manufacturer offers parts.
If you find yourself “double stripping” or seeing more nicks than usual, treat that as a maintenance signal rather than a skill issue.
Key takeaways before your next project
If you want fewer do-overs, focus on two things, matching the tool style to your wire and testing your strip on scrap before committing. A good wire cut seats better, a clean strip grips better, and both make your connections feel calmer, which is really what you’re after.
If you’re shopping, decide whether speed or compact durability matters more for your work, then buy within that category instead of chasing “one tool that does everything.” When you’re using what you own, slow down for the first two strips, you’ll go faster for the next fifty.
FAQ
- What’s the difference between a wire stripper and a wire cutter/stripper combo?
Combos add a cutting edge and sometimes crimping features. Dedicated strippers can offer better consistency in a specific range, especially for small gauges. - Why does my stripped wire look scratched or shiny in one spot?
That usually means the blades are biting into copper. Try the next larger gauge setting, reduce squeeze pressure, and re-check jaw alignment if the tool feels loose. - Are self-adjusting strippers good for household 12/14 AWG?
Many are, but performance varies with insulation thickness and jacket material. If the tool slips or tears insulation, a manual combo may be more predictable for those conductors. - Can I use the same tool for solid and stranded wire?
Often yes, but stranded wire is less forgiving. You may need a slightly different setting or a gentler pull to avoid strand loss. - How much insulation should I strip for a crimp connector?
In many cases you strip roughly the length of the metal barrel so copper sits inside without excess exposed. If your connector brand includes a strip-length guide, follow that. - When should I replace my wire cutter/stripper?
If cuts crush instead of shear, strips start nicking copper despite correct settings, or the hinge develops noticeable wobble, replacement or blade service is usually justified. - Is it safe to do electrical work myself if I have the right tools?
Tools help, but safety depends on de-energizing circuits, verifying with a tester, and following local code. If anything feels uncertain, it’s reasonable to consult a licensed electrician.
If you’re trying to reduce rework and want a more predictable setup, it can help to choose a wire cutters stripper tool matched to your most common AWG range, then pair it with the right connectors and a simple strip-length reference so every termination comes out consistent.