
Digital protractor angle finder tools solve a simple, annoying problem: you know the angle matters, but your marks, cuts, or measurements keep drifting because “close enough” rarely is.
If you’ve ever tried to match crown molding corners, set a table saw bevel, check a roof pitch, or confirm a weld prep angle, you already know the real pain point, wasted material and rework.
This guide breaks down what these tools do well, where they mislead people, and how to get repeatable results without overthinking it.
What a digital protractor & angle finder actually measures
Most people buy one thinking it “finds any angle anywhere.” In practice, it measures angles in a few specific ways, and choosing the right type matters more than brand names.
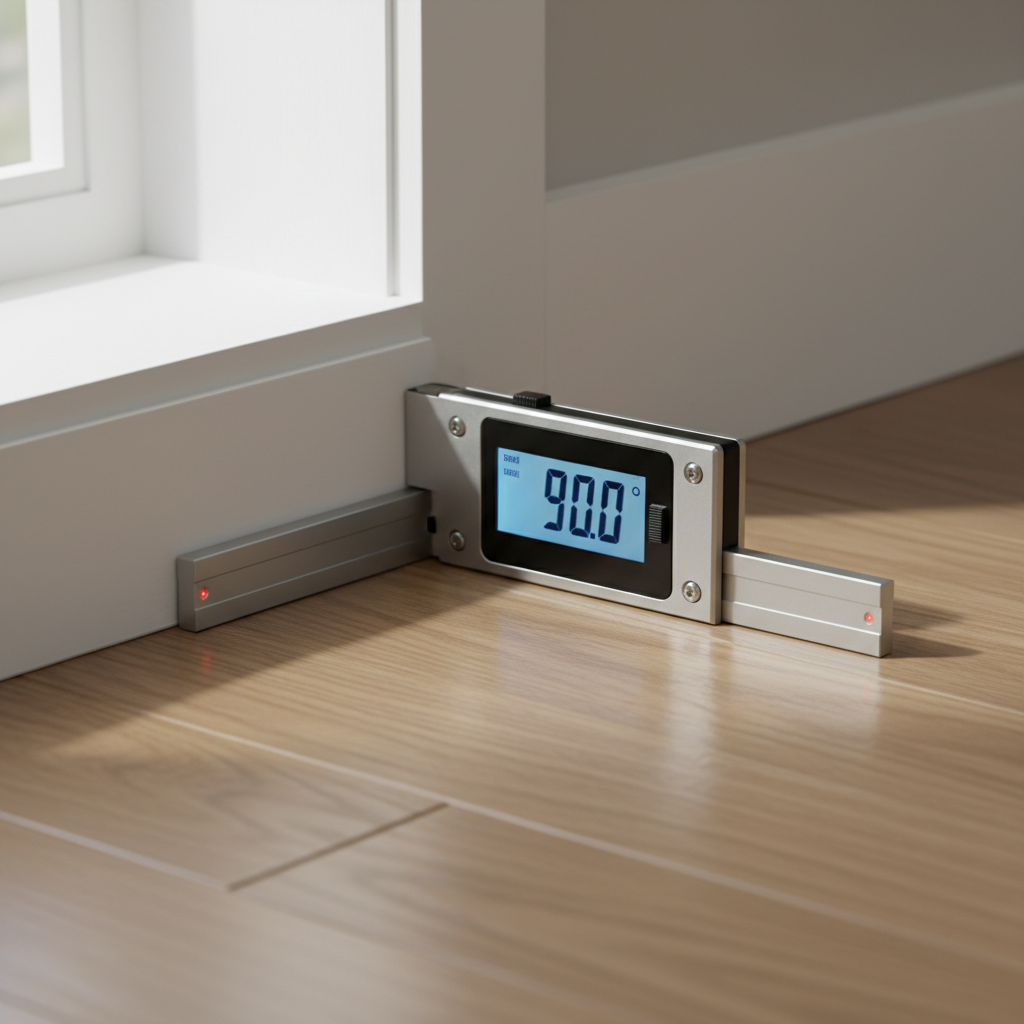
- Digital bevel gauge (two arms + hinge): best for copying an angle from a corner and transferring it to a saw.
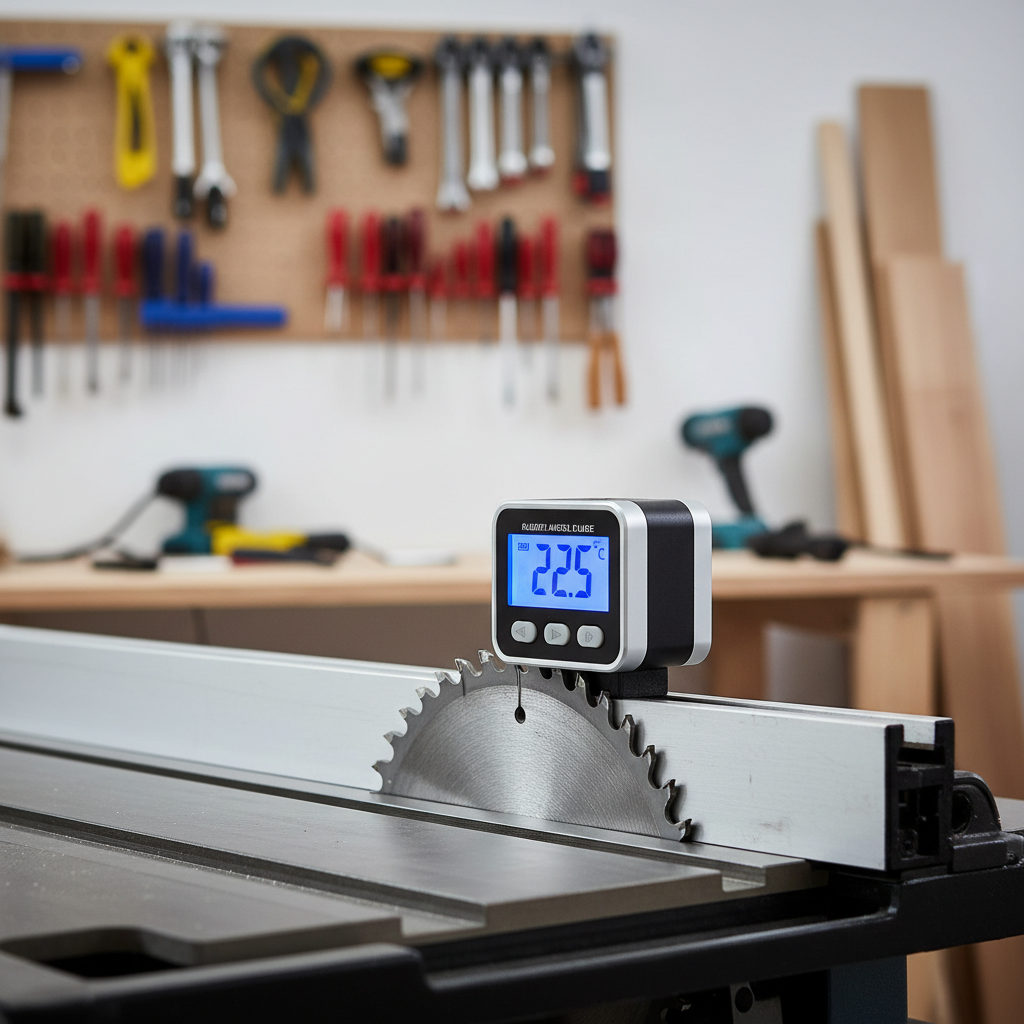
- Digital angle gauge/inclinometer (magnetic cube): best for verifying a blade tilt, slope, or pitch relative to gravity.
- Protractor with a base + rotating blade: best when you need a stable reference edge and a readable scale.
One quick mental model helps: bevel gauges copy geometry from surfaces, inclinometers reference gravity, and protractor-style tools reference an edge.
Common reasons readings look “wrong” (even when the tool is fine)
When a digital protractor angle finder seems inconsistent, it’s often the setup, not a defective sensor.
- Zeroing on the wrong reference: if you zero on a surface that isn’t actually flat or true, every reading inherits that error.
- Surface issues: paint drips, sawdust, burrs, and rounded edges prevent full contact, and the tool “averages” a bad seat.
- Hinge play (bevel gauge): any looseness at the pivot shows up as repeatability problems when you lock and move it.
- Magnet behavior (angle cubes): chips or dust on the magnet face create a tiny standoff that shifts the angle.
- Temperature and handling: quick moves, flexing thin stock, or pressing too hard can slightly bend the reference plane.
According to NIST, measurement accuracy depends heavily on traceable reference standards and proper calibration, which is a fancy way of saying your “reference” matters as much as the device.
Quick self-check: which tool and method fits your job?
Before you troubleshoot for an hour, it helps to identify your scenario. These quick checks usually point to the right approach.
If you’re cutting trim, baseboard, or crown molding
- Do you need to copy an existing corner? Use a digital bevel gauge.
- Do you need to set the saw’s bevel precisely? Pair the bevel gauge with an angle cube on the saw.
If you’re setting machine angles (table saw, miter saw, jointer fence)
- Use a digital inclinometer and zero it to the table surface before measuring the blade or fence.
- If your saw table isn’t level, that’s fine, you’re measuring relative to the table, not your floor.
If you’re checking slope (roof pitch, ramps, drains)
- Use a digital angle gauge and confirm the unit (degrees vs percent grade) before you start.
- For longer spans, use a straightedge and measure off that, small tools can exaggerate tiny bumps.
If you’re doing metalwork or inspection
- Confirm whether you need angle, bevel, or included angle (two faces). Tools vary.
- Plan for a cleaner contact surface, scale, spatter, and burrs matter.
How to get accurate, repeatable results (step-by-step)
The goal is repeatability. You can’t control every variable, but you can control your reference, contact, and confirmation.
1) Establish a trustworthy reference
- For inclinometers, place it on the machine table or a known flat surface and hit ZERO.
- For bevel gauges, close the arms together and confirm the display reads what the tool expects at “closed,” then reset if your model supports it.
2) Clean contact points
- Wipe the tool faces, remove dust on magnets, and clear burrs where the tool seats.
- If you’re measuring wood, avoid resting on rounded corners, use the flat face a half-inch in from the edge.
3) Take two readings on purpose
- Measure, lift, reseat, measure again. If the numbers disagree, it’s usually seating or hinge play.
- On a saw, check both 0° and a known angle (like 45°) to see if the error is consistent or only at one end.
4) Transfer the angle without changing it
- Lock the bevel gauge firmly, then carry it like a rigid triangle, not like a loose ruler.
- If you’re setting a miter saw, set the saw to the copied angle, then verify with an angle cube or a second reference when possible.
5) Confirm with a real-world test cut or fit
This step feels basic, but it saves material. With trim, a test cut on scrap tells you more than staring at decimals.
Choosing a digital protractor angle finder: what to prioritize
Specs can be noisy. In the real world, a few features determine whether the tool becomes a daily grab or a drawer resident.
| Use case | Recommended type | Features that matter | Common “gotcha” |
|---|---|---|---|
| Copying corner angles | Digital bevel gauge | Rigid arms, solid lock, easy-to-read display | Hinge play causes drift after you move it |
| Setting saw blade bevel | Angle cube/inclinometer | Strong magnet, quick zero, stable base | Dirty magnet face throws off readings |
| Checking pitch/slope | Inclinometer (longer base helps) | Degree + % grade modes, backlit screen | Short base exaggerates surface bumps |
| General layout | Protractor-style angle finder | Flat reference edge, durable scale, repeatability | Edge not square becomes your hidden error |
Look for a tool that makes your workflow faster, not one that promises more digits. Extra resolution rarely helps if contact surfaces are messy.

Mistakes that waste time (and how to avoid them)
- Chasing perfect decimals: if your stock moves, your blade has runout, or your corner isn’t square, 0.1° precision won’t show up in the fit.
- Mixing “miter angle” and “corner angle”: many trim cuts require splitting an inside corner angle, don’t set the saw to the full corner reading without checking the cut geometry.
- Forgetting to lock or re-zero: easy to do when you’re moving fast, then every measurement looks random.
- Assuming the tool is calibrated forever: impacts and drops happen, occasional checks keep you honest.
- Measuring on rough reference surfaces: drywall corners and old trim can be wavy, measure a few points and use a practical average.
When calibration or professional help makes sense
For DIY and most shop tasks, a simple comparison check is enough. Still, there are situations where you should be more conservative.
- If the tool is used for quality inspection, regulated work, or a process where angle error creates safety risks, consider a calibration service or a documented reference standard.
- If you see inconsistent readings after cleaning, re-zeroing, and repeating, the sensor or hinge may be worn, replacement often costs less than the time you’ll burn.
According to OSHA, employers must keep tools and equipment in safe condition; if angle measurement affects safe operation, it’s worth involving a qualified supervisor or technician.
Key takeaways (the part you’ll actually remember)
- Zero to the right reference and your readings become predictable.
- Most “bad readings” come from poor contact, hinge play, or dirty magnets, not the electronics.
- Use a bevel gauge to copy angles, and an angle cube to set machines, mixing them usually works better than forcing one tool to do everything.
- When the work is safety-critical or regulated, treat calibration seriously and ask a professional if needed.
Conclusion: a small tool that pays off when you use it like a system
A digital protractor angle finder is most useful when you treat it as part of a routine: establish a reference, take repeat readings, transfer carefully, then verify with a quick test fit. Do that, and you’ll waste less material and spend less time “debugging” your own cuts.
If you want one simple next step, pick one project this week and run a two-reading check every time you measure an angle, you’ll spot the real source of error fast.
FAQ
- What’s the difference between a digital protractor and a digital angle finder?
In many listings the terms overlap, but typically a digital protractor references an edge or rotating blade, while an angle finder often means an inclinometer that measures relative to gravity. - Why does my angle cube read differently when I move it a few inches?
Usually the surface isn’t flat, or debris on the magnet creates a tiny gap. Try a straightedge, clean the base, and re-zero on the same reference plane. - Do I need to calibrate a digital bevel gauge?
For everyday carpentry, periodic comparison checks often work: measure an angle, re-seat, re-measure, then confirm on a known square or reference. If it can’t repeat, calibration or replacement may be smarter. - Can a digital angle finder help with crown molding?
Yes, especially for copying corner angles, but crown involves compound cuts. Many people still rely on test pieces because wall corners vary and trim spring angle changes the math. - What accuracy should I look for?
Many tools advertise tight accuracy, but real-world outcomes depend on setup and contact. Prioritize repeatability, a stable base, and a reliable lock over extra decimal places. - My readings flip between degrees and percent grade, which should I use?
Use degrees for saw setup and angle transfer, and percent grade for slope work like ramps or drainage. Confirm the mode before you start so you don’t chase the wrong number. - Is it safe to use these tools around spinning blades?
Use common-sense precautions: power off and unplug when placing tools on blades or fences, and follow your equipment manual. If you’re unsure, ask a qualified professional.
If you’re trying to pick a tool without buying twice, it often helps to list your top two tasks, copying corner angles vs setting machine bevels, then choose a digital bevel gauge or angle cube accordingly, and add the second tool later only if your workflow demands it.