
Lock ring plier set for auto jobs is one of those tools you only notice when it’s missing, usually halfway through a CV axle, wheel bearing, or transmission-side repair, with a snap ring that refuses to cooperate.
If you’ve ever watched a circlip launch across the garage or felt the tips slip out and chew up the ring ears, you already know why this matters: the right pliers save time, prevent parts damage, and reduce the “why is this taking so long” frustration.
This guide breaks down what an auto-focused lock ring plier set should include, how to match pliers to internal vs. external rings, and a practical way to choose a set without overpaying for features you won’t use.

What “lock rings” are in automotive work (and why pliers matter)
In automotive contexts, “lock rings” often mean snap rings, circlips, retaining rings, and similar fasteners that sit in a groove to hold a bearing, shaft, or component in place. They’re simple parts, but they can be surprisingly unforgiving.
The reason pliers matter is tip engagement. When the tip size or angle is wrong, you end up spreading force sideways, deforming the ring ears, scratching a machined surface, or popping the ring out unexpectedly.
- Internal rings: sit inside a bore or housing, you squeeze the pliers to shrink the ring.
- External rings: sit on a shaft, you squeeze to expand the ring.
- Heavy-duty rings: common around hubs, differentials, some transmissions, often thicker and harder to move.
According to OSHA, flying objects are a common shop hazard, and small parts under spring tension can become projectiles—eye protection is a smart default whenever you’re working with retaining rings.
Why a dedicated lock ring plier set beats “one plier fits all”
A single snap-ring plier can work for occasional tasks, but auto work tends to throw variety at you: different diameters, different access angles, and rings recessed behind seals or inside tight housings.
Where sets help most is access and control. You swap tips and angles instead of muscling the ring at a bad angle, which is usually when tips slip.
- Angle options (0°, 45°, 90°) help when the ring sits behind a flange or inside a deep bore.
- Tip diameter choices reduce wobble in the ring holes and improve bite.
- Internal/external capability prevents using the wrong motion on the wrong ring type.
If you’re doing hubs, axles, transmissions, or suspension work even a few times a year, a set usually pays for itself in fewer damaged rings and fewer “redo” moments.
Quick self-check: what kind of set do you actually need?
Before buying anything, run through this. It keeps you from buying a huge kit when you really need one solid pair, or buying a light kit that can’t handle thicker automotive rings.
- You mostly do brakes, sensors, interior trim: you may only need small tips and light tension.
- You do wheel bearings/hubs or CV axle work: plan on medium-to-large rings, higher spring tension, and angled access.
- You touch transmissions/differentials: favor heavy-duty construction, strong pivot, and tips that won’t twist.
- You work on mixed makes/ages: prioritize a wide diameter range and multiple tip sizes.
- You hate hunting for parts: a blow-mold case is not “just packaging,” it keeps tips from disappearing.
One more reality check: if you’ve already rounded off ring holes with a pick or screwdriver, you’ll want tips that fit snugly and a plier body that stays rigid under load.
What to look for in a lock ring plier set for auto use
Most sets look similar online, but performance comes down to a few details that don’t show up in the first product photo.
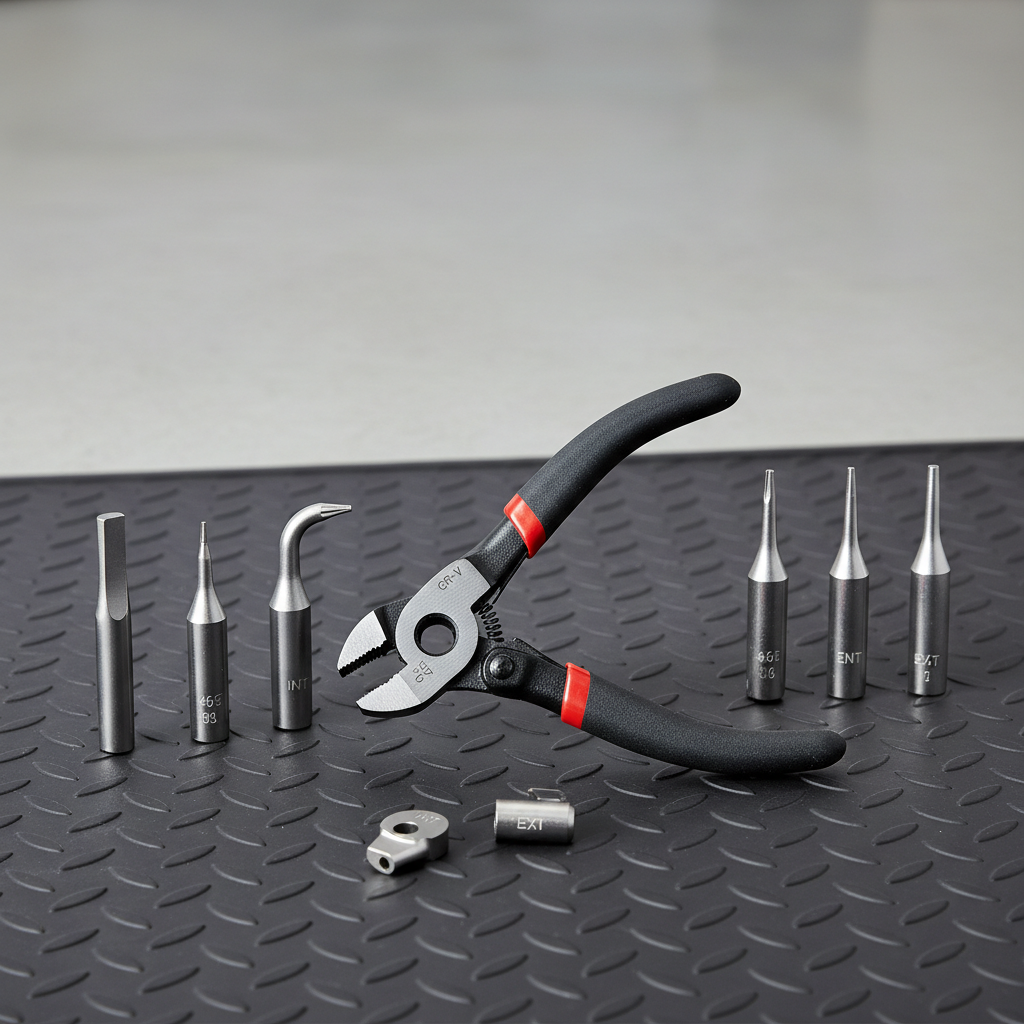
Tip system: fixed vs. interchangeable
- Interchangeable tips add flexibility and usually cover more angles in less space.
- Fixed-tip pliers can feel more rigid and confidence-inspiring for heavy rings, but you may need more than one pair.
If you work in tight spaces, interchangeable tips with positive retention (not just friction) can reduce the chance of a tip backing out mid-compression.
Internal/external conversion
Many kits let you flip a mechanism to switch between internal and external use. It’s convenient, but check that the switch feels solid. If it feels vague in hand, it often feels worse under load.
Material and pivot strength
For automotive retaining rings, rigidity matters. A plier that flexes will “walk” its tips out of the ring holes. Look for a stout pivot joint and handles that don’t splay easily.
Handle comfort (yes, it matters)
On paper, grip comfort sounds like a luxury. In practice, when you’re compressing a stubborn ring in a deep bore, a slippery or sharp-edged handle makes you rush, and rushing is when rings fly.
Comparison table: common set types and who they fit
Use this as a buying shortcut. It’s not about brand names, it’s about matching the tool class to the work you actually do.
| Set type | Best for | Strengths | Trade-offs |
|---|---|---|---|
| Basic interchangeable-tip kit | DIY maintenance, occasional snap rings | Affordable, covers multiple angles | May flex on thick rings, tips can wear faster |
| Heavy-duty fixed pliers (2–4 pieces) | Hubs, axles, frequent drivetrain work | Rigid feel, strong pivot, better control | Less flexible, costs more per configuration |
| Pro master set (multiple pliers + tips) | Shops, mixed vehicles, daily use | Fast access, broad coverage, organized storage | Higher upfront cost, bulkier storage |
How to use lock ring pliers without damaging the ring (step-by-step)
Lock ring plier set for auto work performs best when you slow down for the first 20 seconds. That’s usually the difference between a clean removal and a ring that turns into a “replace it” item.
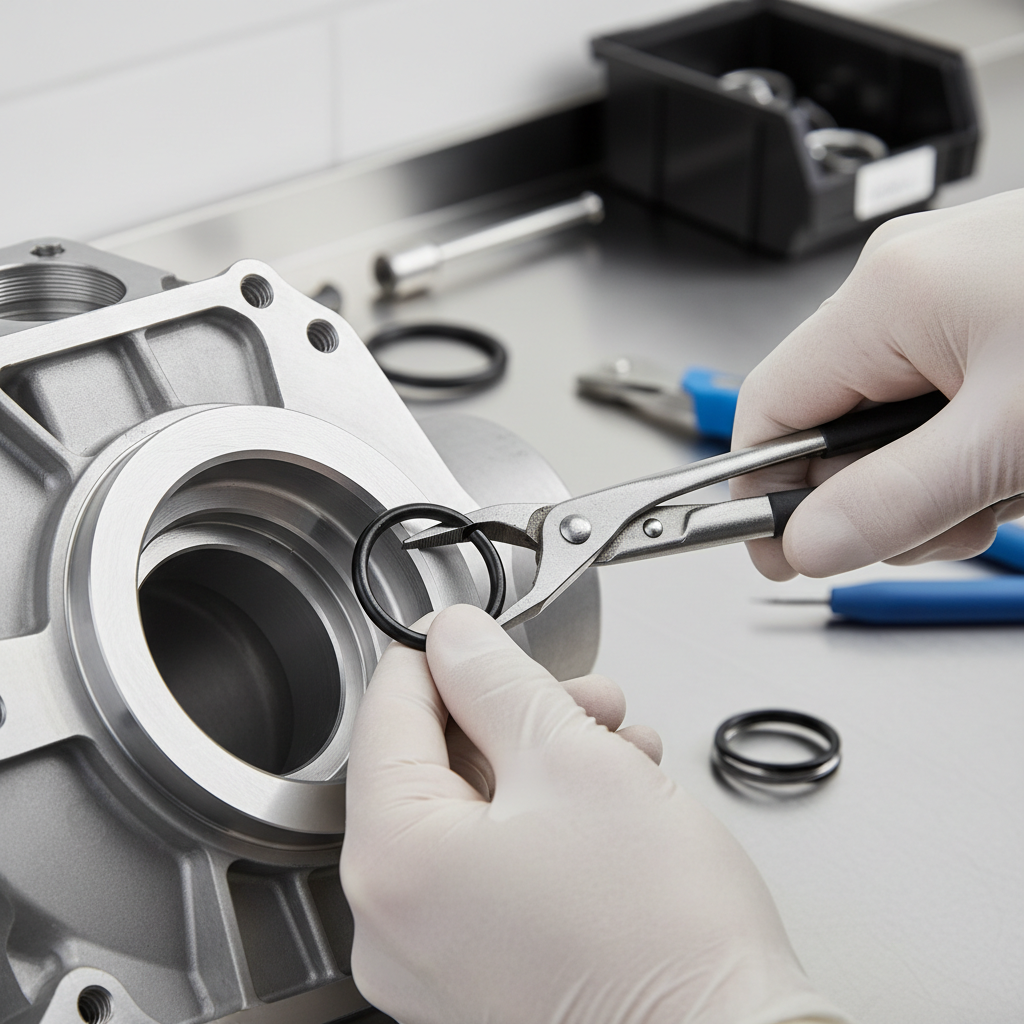
Removal: internal ring (in a bore)
- Clean the area so the ring holes are visible, brake cleaner and a rag often help.
- Pick tip size that seats deeply in the ring holes, if it feels loose, switch tips.
- Squeeze just enough to clear the groove, then lift out slowly, keeping the ring controlled.
- If the ring is stuck, stop and check for corrosion or a burr, forcing it can gouge the bore.
Removal: external ring (on a shaft)
- Confirm it’s external, then expand only as much as needed to clear the groove.
- Shield with your free hand (not in the line of fire), and consider a shop rag to catch it.
Install tips that keep you safe
- Wear eye protection, rings can spring free even when you do everything right.
- Replace rings that feel distorted, many are inexpensive compared to the labor involved.
- Lightly oil the ring and groove if corrosion is present, but avoid contaminating friction surfaces.
According to NIOSH, eye protection is a key control for preventing common shop injuries, and snap rings are exactly the type of “small, fast, sharp” hazard that deserves respect.
Mistakes that waste time (and how to avoid them)
Most failures come from a few predictable choices. Fix those, and the tool suddenly feels “better,” even if it’s the same set.
- Using the wrong tip diameter: too small and it cams out, too large and it won’t seat.
- Over-expanding/over-compressing: rings lose shape, then never sit right in the groove again.
- Pulling at an angle: the tips twist, the ring skews, and the ears deform.
- Ignoring grime: packed grease hides ring holes and makes it feel “stuck” when it’s just dirty.
- Reusing a questionable ring: if it looks bent, it may not retain correctly under load.
If you find yourself fighting the same ring for more than a minute, that’s usually a sign to change the angle tip, change the approach, or clean the groove, not a sign to squeeze harder.
When to stop and get help (or change the plan)
Some snap rings are part of assemblies where a mistake gets expensive. If you’re unsure, it may be worth asking a pro or checking a factory service manual before forcing anything.
- Transmission or differential internals: incorrect ring seating can cause drivability issues or internal damage.
- Press-fit bearings and hubs: mis-seated rings can lead to bearing movement, noise, or premature failure.
- Corroded housings: aggressive removal may damage grooves, a machine shop or experienced tech may have safer options.
According to NHTSA, maintaining safe vehicle condition is critical; if a retaining ring relates to steering, braking, or wheel retention, caution is justified and professional inspection can be the safer path.
Key takeaways and a simple buying plan
If you want one practical approach, match the tool to the hardest job you realistically do. If hubs and axles show up on your weekend list, buy for that level, not for the easiest ring you’ve ever removed.
- Prioritize tip fit over high piece count, loose tips create most headaches.
- Get angle options if you work in tight bays or recessed housings.
- Choose rigidity if you touch thicker rings, flex is the enemy of control.
Action step: pick one vehicle job you expect soon, identify whether it uses internal or external rings, and buy a set that includes that ring diameter plus at least one angled option.
FAQ
What is the difference between snap ring pliers and lock ring pliers?
In auto tool listings, the terms are often used interchangeably. What matters is whether the pliers are made for retaining rings and whether they support internal and/or external rings with the right tip sizes.
How do I know if I need internal or external pliers?
Look at where the ring sits. If it sits inside a bore, it’s typically internal. If it sits around a shaft, it’s typically external. If you’re unsure, take a photo before removal so you can confirm during install.
Is an interchangeable-tip set strong enough for wheel bearing snap rings?
Sometimes, yes, especially on lighter-duty applications. For thicker, high-tension rings, a more rigid tool tends to feel safer and slip less. If you regularly do hubs, consider heavier-duty options.
Why do my snap ring plier tips keep popping out?
Common causes include tips that are too small for the ring holes, pulling at an angle, or a tip retention system that isn’t tight. Switching to the correct tip size and approaching squarely usually helps fast.
Can I reuse a snap ring after removing it?
Many people do, but it depends on condition. If the ring looks distorted, doesn’t sit flat, or feels loose in the groove, replacement is usually the safer choice, especially in drivetrain and wheel-end areas.
What size lock ring plier set should I buy for general automotive repairs?
A set that covers small to medium rings with straight and angled tips fits a lot of common jobs. If you also do hubs or drivetrain work, make sure the kit explicitly supports larger diameters and higher tension rings.
Do I really need eye protection for snap rings?
It’s strongly recommended. Rings store spring energy, and even a controlled removal can slip. Safety glasses are a low-effort habit that prevents a high-consequence mistake.
If you’re trying to choose a lock ring plier set for auto projects without buying twice, it helps to list the next 2–3 jobs you’ll tackle and pick a kit that matches the tightest access and the thickest ring among them, that’s usually the most cost-effective way to end up with tools you actually trust.